I spent the day practicing a couple of different techniques on one image. I painted with both the pattern stamp tool, where you load your image as a pattern and then use the pattern stamp tool like a brush, and I used the Clone Painting Action that comes with Photoshop and the Mixer Brush on various layers. I also used some plain old filters in Photoshop to do my first underpainting which worked really well and saved some time in the first step.
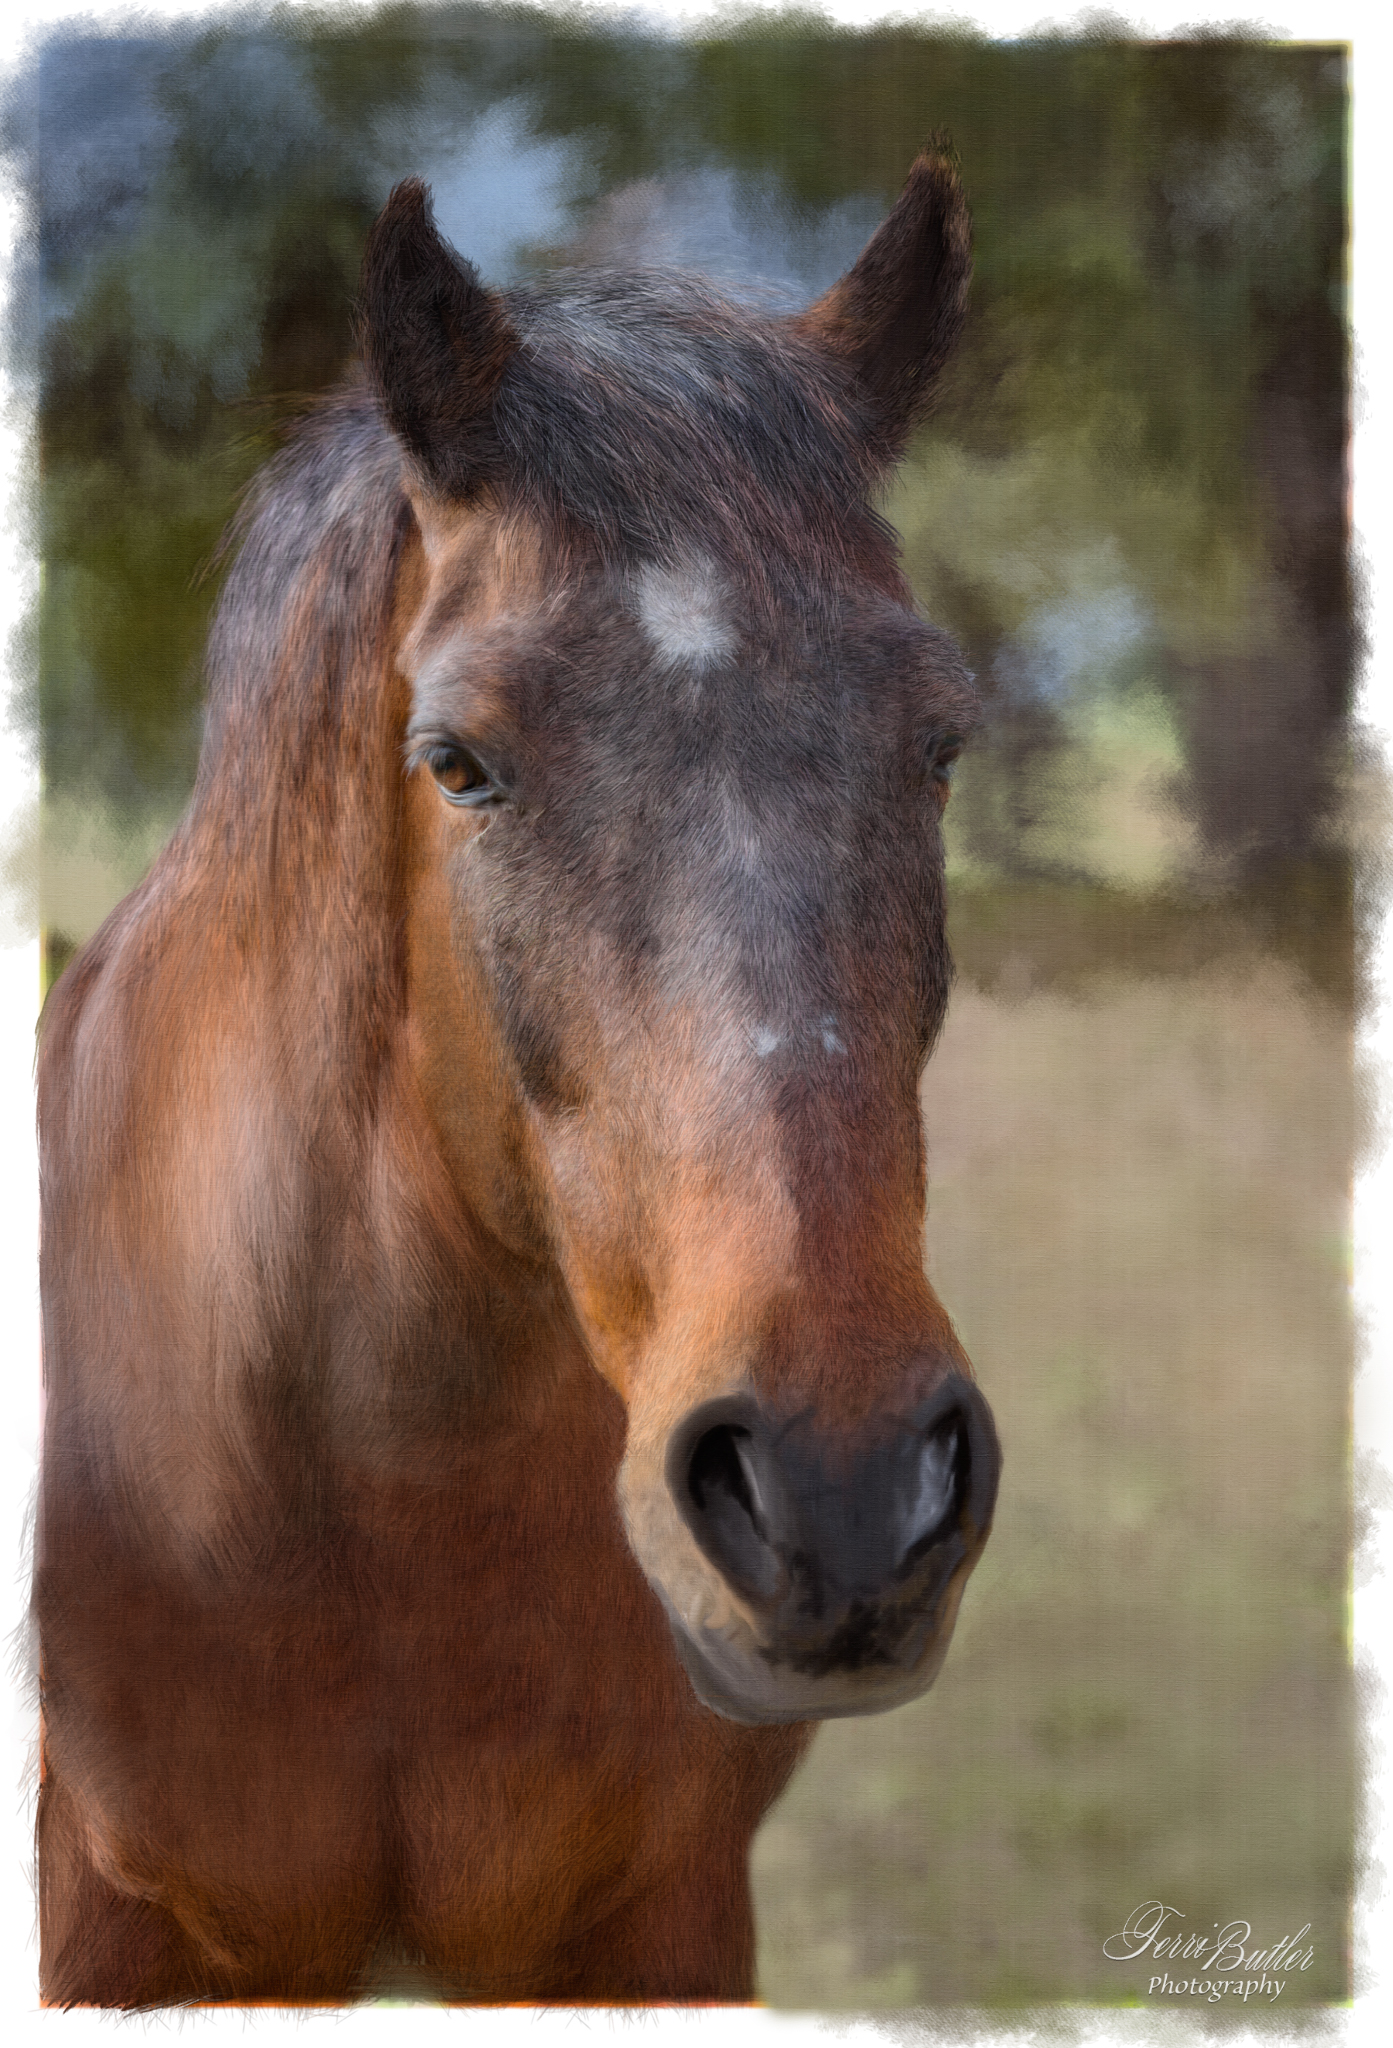
I used several different types of brushes but the neatest technique today was taking one the fur brushes from the Aaron Blaise series that I purchased, and using it with a Pattern Stamp tool instead of a regular brush, which is how it was intended to be use. As a brush, you have to continually sample your colors as you paint. If you load the image as a “pattern”, you get to sample the colors right from the pattern. Which allows you paint faster and to modify the size of the brush quickly to get a variety of different looks and hair techniques from one brush… no color sampling required. This was the technique I used on the face of the horse. I used the same technique on the mane and body but they were on different layers so I could vary the stroke, brushes and add blur to simulate the depth of field. Several of the body parts are painted on different layers so I could make these depth of field adjustments.
I used the mixer brush for the eyes and nose; both on different layers so I could add contrast and sharpening as needed. I used a different type of pattern stamp brush to smudge the background colors. I finished it off with a pattern fill and a canvas texture with soft light blend mode.
Overall I’m pretty satisfied with how it came out..
Here is the original…

