As a digital painter, I wanted to find a way to make the brush stroke look real. When you paint with oil or acrylic and you really load the brush with paint, you get the 3D effect of the thick paint on the canvas. Trying to recreate that effect in the 2D world of Photoshop is a challenge. I’ve been researching the “impasto” painting techniques on the internet and YouTube and came across the brushes and painting effect of Michael Adamidis, a professional artist from Germany. He sells a set of brushes which include some impasto brushes, but also a file with some painting effects and layers with a bevel effect that when combine with his brushes, give you this 3d effect.
I bought his set of brushes and the “magic canvas” file and then proceeded to diagnosis what was happening behind the scenes. I’m not a traditional painter, so I can’t use his canvas as designed. For one thing, it’s too small. I generally composite and paint much larger and need something more scalable. So I turned his bevel effects into layer styles that could be applied to any layer, turned the painting effects and textures into patterns that could be applied as an adjustment layers. This now gives me the flexibility to mix these technique in around my mixer brush layers and even within my composites without the need to clip them as layers to a painting layer.
To test the usability of these new artifacts of patterns and styles, I decided to try a quick impasto mixer brush painting. This is my standard “clone painting” of a photograph where I use the original photo, make a special “mixer brush layer” by merging a copy of the photo at 1% opacity with a blank layer at 100% opacity. This special mixer brush layer now contains 100% of the image pixels at 100% of the hue, saturation and luminosity when brushed with a mixer brush. I can now use these new impasto brushes on a single layer, WITHOUT SAMPLE ALL LAYERS turned on, to see if I can get this 3D effect on my clone paintings.
I’m happy to say it worked perfect!.. I applied the layer style for the bevel and emboss to the mixer layer and I put one of the painting effect patterns at the top of the stack to cover the final image. This painting effect layer is in the vivid blend mode and lowered opacity.
I painted the forward flowers on one layer, the secondary flowers on another layer, the stems on a third layer and then used one of the round brushes from the Michael Adamidis collection to do a full underpainting of the entire image. The order of the layers in PS from bottom to top are original image, then underpainting, then secondary flowers, stems, front flowers and the top layer is that painting effect pattern. I merged all visible into a single layer and ran it through the high pass filter with about 7.0 px just to give the edges some sharpness.
Here is the final painting:
![]()
I won’t declare this my best painting effort… it only took about an hour. I was primarily focus on testing the techniques of the impasto layers and brushes… but it demonstrates that the effects can be applied to clone painting as well as painting on a blank canvas.
And a couple of zoomed in images for details:
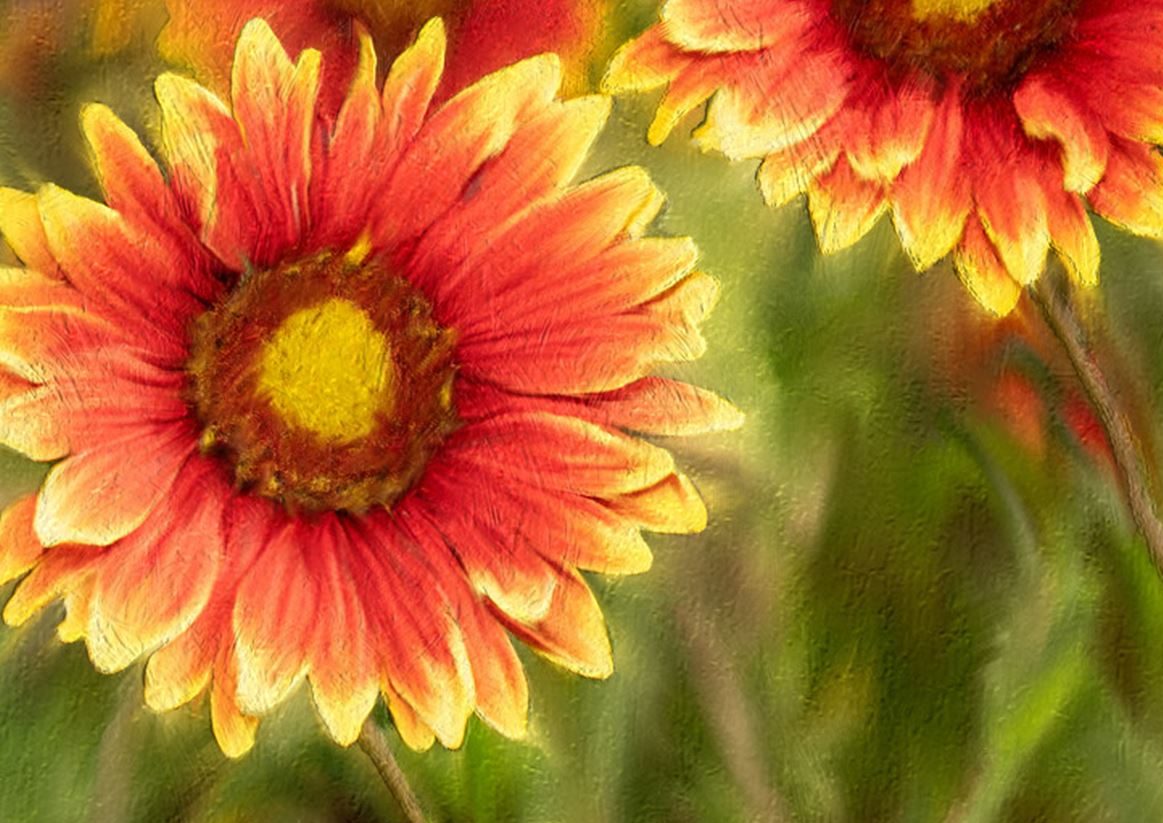 |
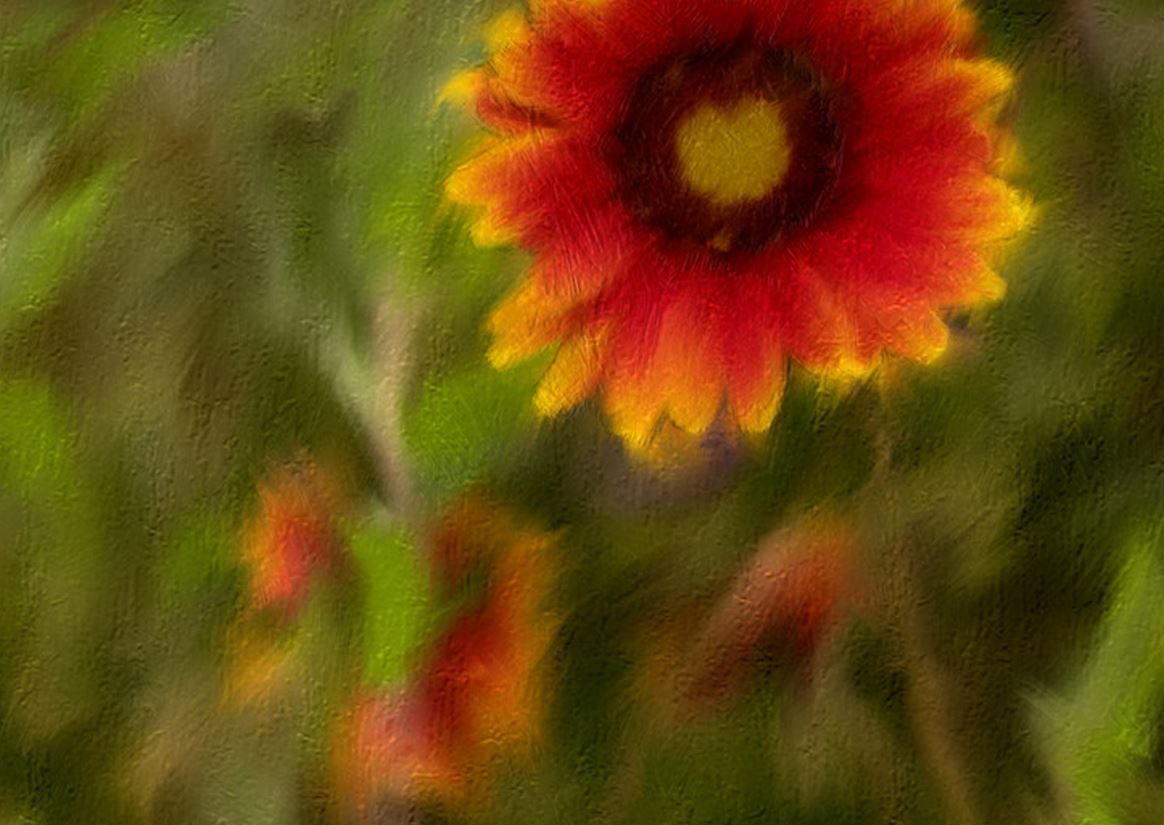 |
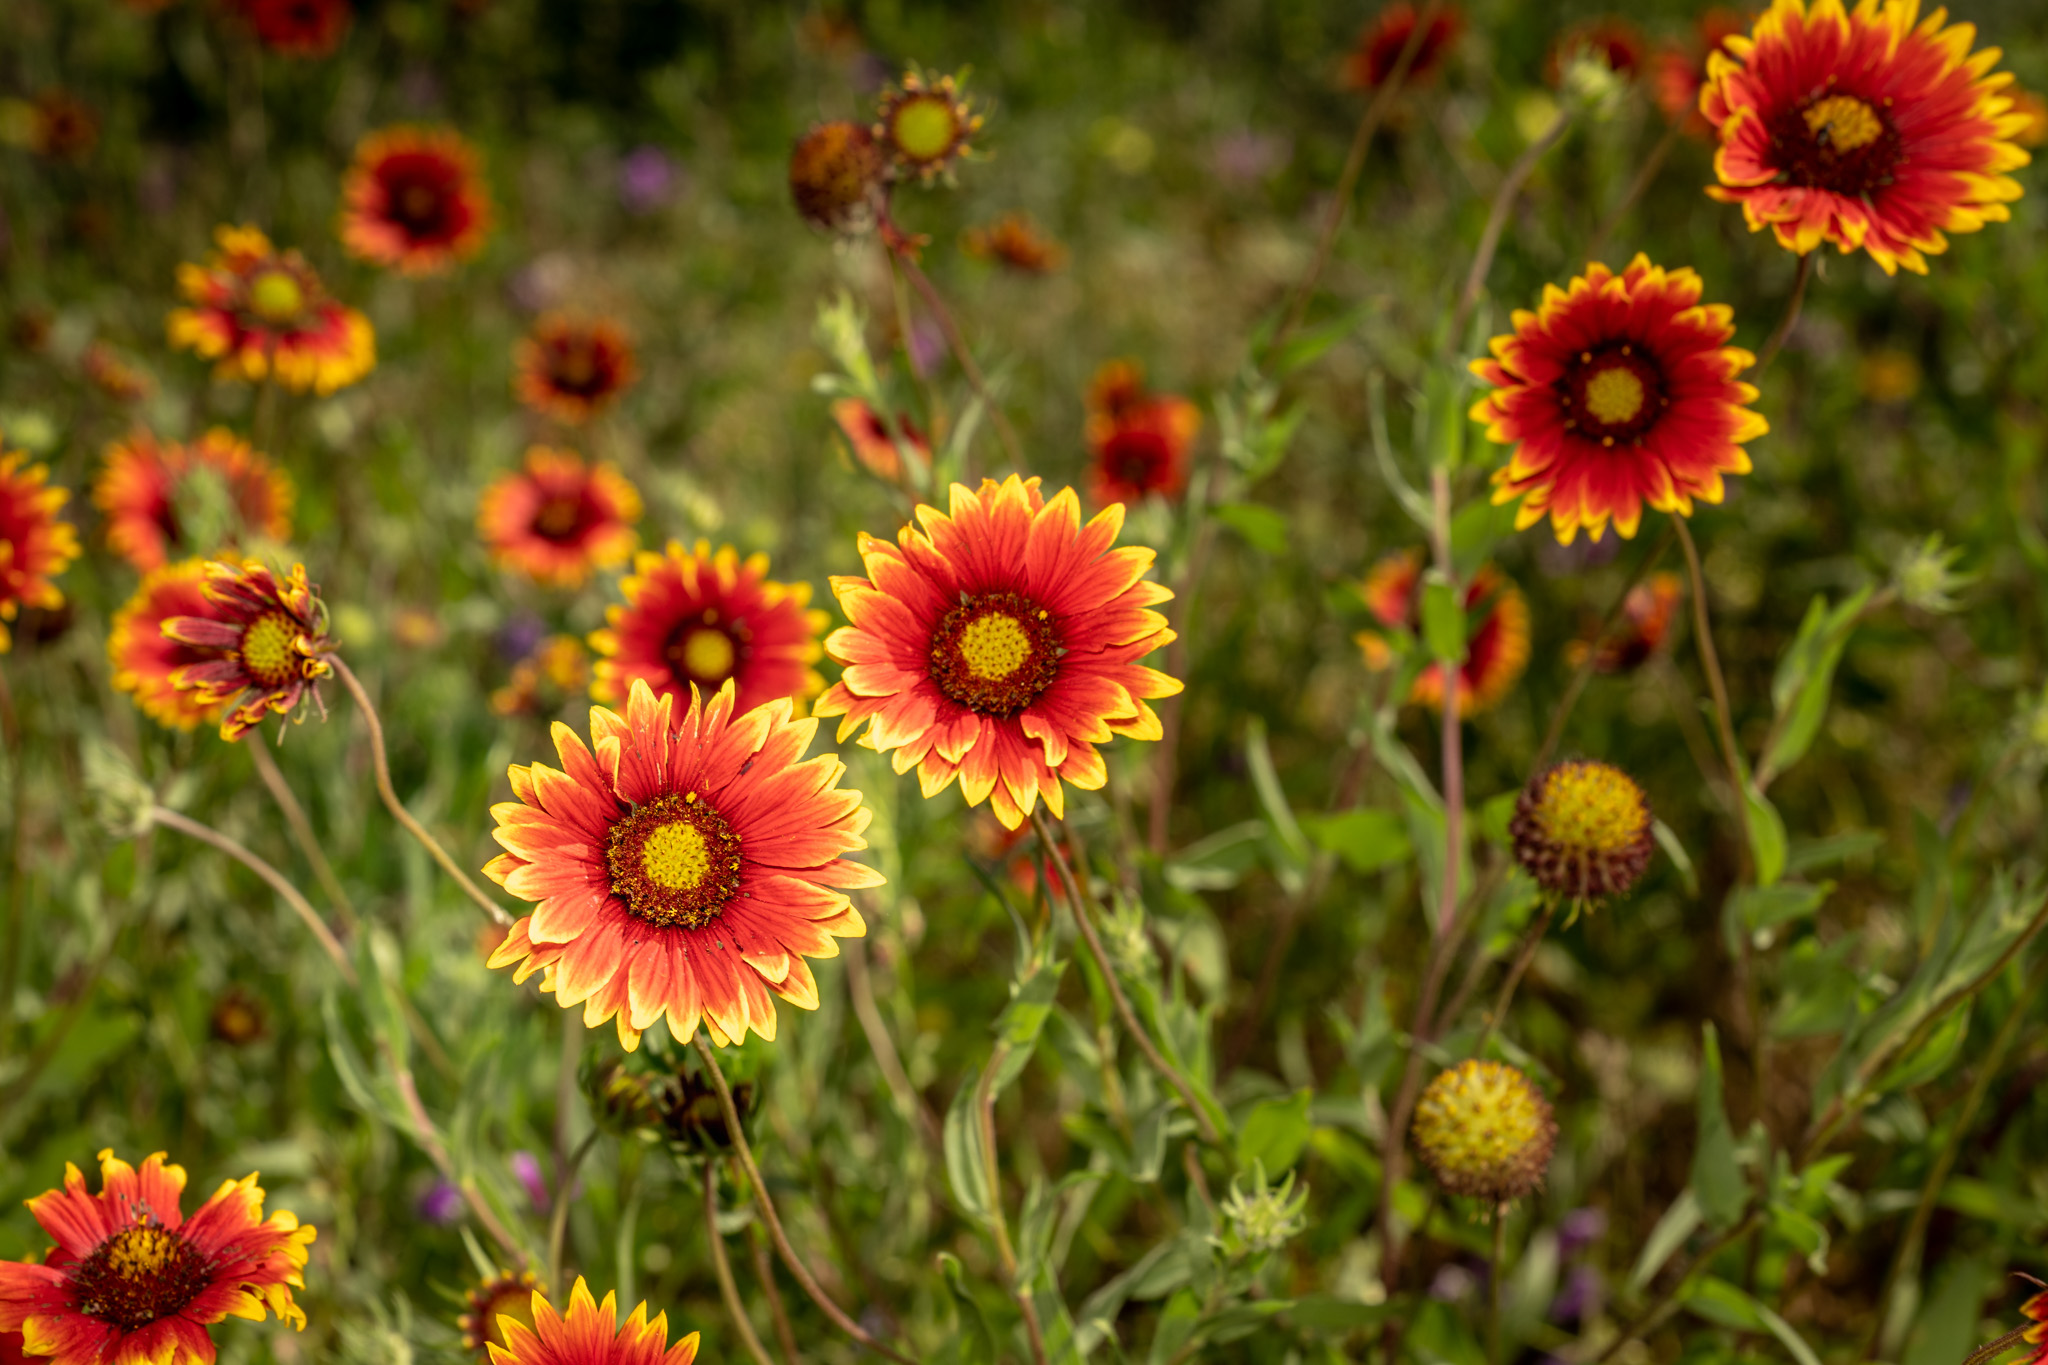
Original image
terributlerphotography,#digital_art, #fine_art, #prints, #wallart, #art, #photomanipulation, #photocomposite, #http://shutterstock.com/g/terributlerphotography/sets, #https://stock.adobe.com/contributor/206561680/Terri
