Someone asked me a question on Facebook about my technique for blending my cutouts into the background, so I thought I would write a little article about it.
I actually use two different technique, one during my compositing and one final step to blend all the elements seamlessly into the final background. When I’m building large composites with 50 -100 or more layers, the files get so big that I can’t build the hero images and the background in the same file. So I generally (even with my paintings) build my background in one file, save the layers and just make a merged copy at the top to move over into my painting.
But when I working with the cutouts I use this interim edge smoothing technique first. This only works while you are still using the elements you cut out from their backgrounds and after you have cleaned them up and have them ready for the final compositing.
TECHNIQUE ONE
- Hold your Ctrl (Cmd) and click on the cutout layer. This will load it as a selection. You will see the marking ants around your cutout so you know that it is selected.
- Now go to the menu to Select->Modify->Contract and enter about 5 pixels. (I’m assuming that you are using pretty hi-res images. If you have very low res images you might want to reduce this to about 3).
- Now – REVERSE YOUR SELECTION, using either the hotkey of Shift+Ctrl/Cmd+I or go to the Selection menu again to Select->Inverse. YOU ARE NOW ONLY SELECTING THOSE 5 pixels on the edge.
- Now you can do a Select->Modify->Feather and enter 3-4 pixels.
- I also do a very small Gaussian Blur on these edge pixels. Go to Filters->Blur->Gaussian Blur and enter 0.5 pixels. This is just a small amount of blur on top of the feathering.
- Release your selection Ctrl+D
- Done!
This seems like a lot of steps, but once you do it 3 or four times, it will be natural. Just think about what you’re doing. You are isolating those 5 pixels on the edge and putting a slight blur and feather on them.
That is technique one… I do this with almost all my cutouts that will eventually get blended into a composite. IF YOU ARE PAINTING, you probably can skip this step because you are going to be smudging all those pixels with your paint brush.
NOTE: I no longer recommend this second technique. See most recent video posted 09/20/2021
TECHNIQUE TWO
SO, for the painters, here is another final blending step I do when I have my FINAL painted hero element and I want to seamlessly blend it into the background I built. This step will seem counter-intuitive, but stick with me… you will be surprised with the final results!
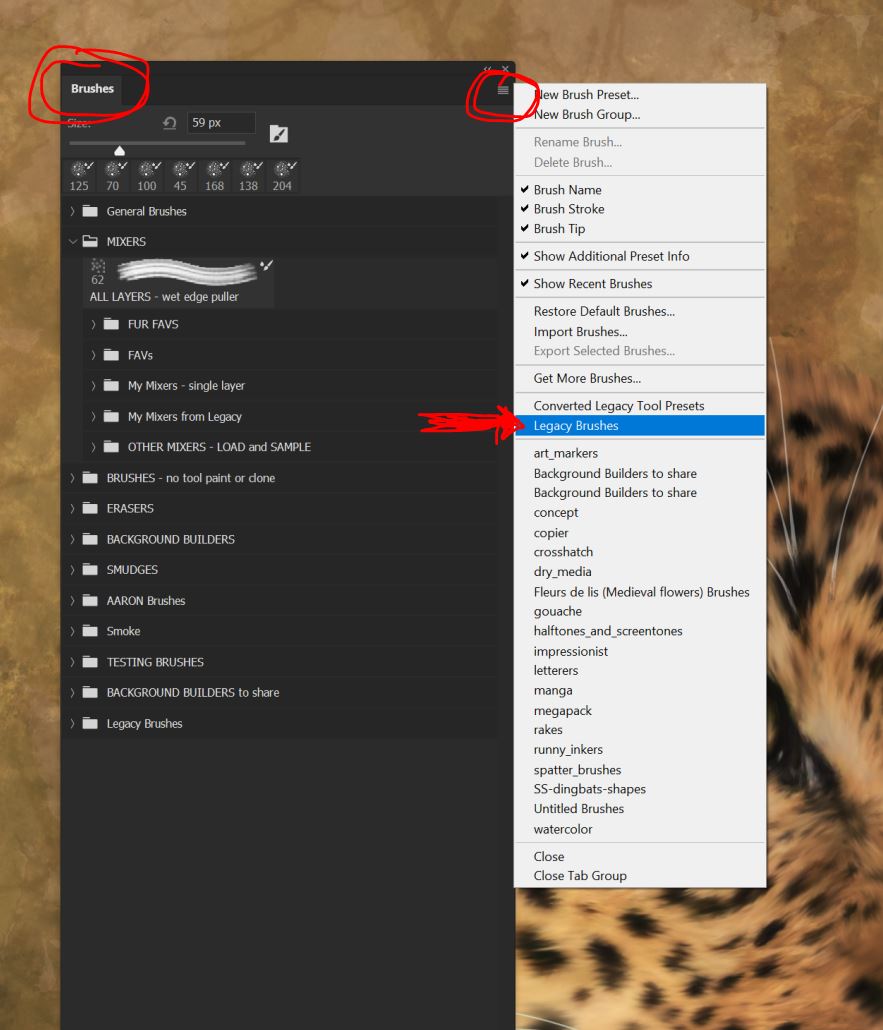
First you need to ensure that you have the right brush for this step. The brush I use is part of the Photoshop legacy brushes, it’s the Spatter 59 brush that I’ve made a mixer. I will put the details of the settings at the bottom of the post. If you have not loaded your legacy brushes back into Photoshop, here is where you get them:
The splatter 59 brush is in the Default Brush folder
Back to the painting.
- Make sure the background and your painted element are turned on and visible
- TURN OFF visibility on any other layers in your stack, we only want to sample the background and the painted element.
- ADD A BLANK LAYER ABOVE YOUR PAINTED element
- Ensure your Spatter 59 brush is set to “Sample All Layers” on your brush setting panel.
- As all our images are different sizes, you will need to resize your brush so the diameter of your brush is about double the size of the edge of your image. You want about 1/4 to 1/2 inch of smudge overlapping when you paint. (see my 100% view below)
- Now slowly paint around the edge of your image. Don’t drag it to much, take smaller short strokes where you have fur. On straight edges you can move faster. BUT, the brush will be slow as it is sampling layers. If you have an older machine, this can take minutes, not seconds for the processor to complete, so be patient.
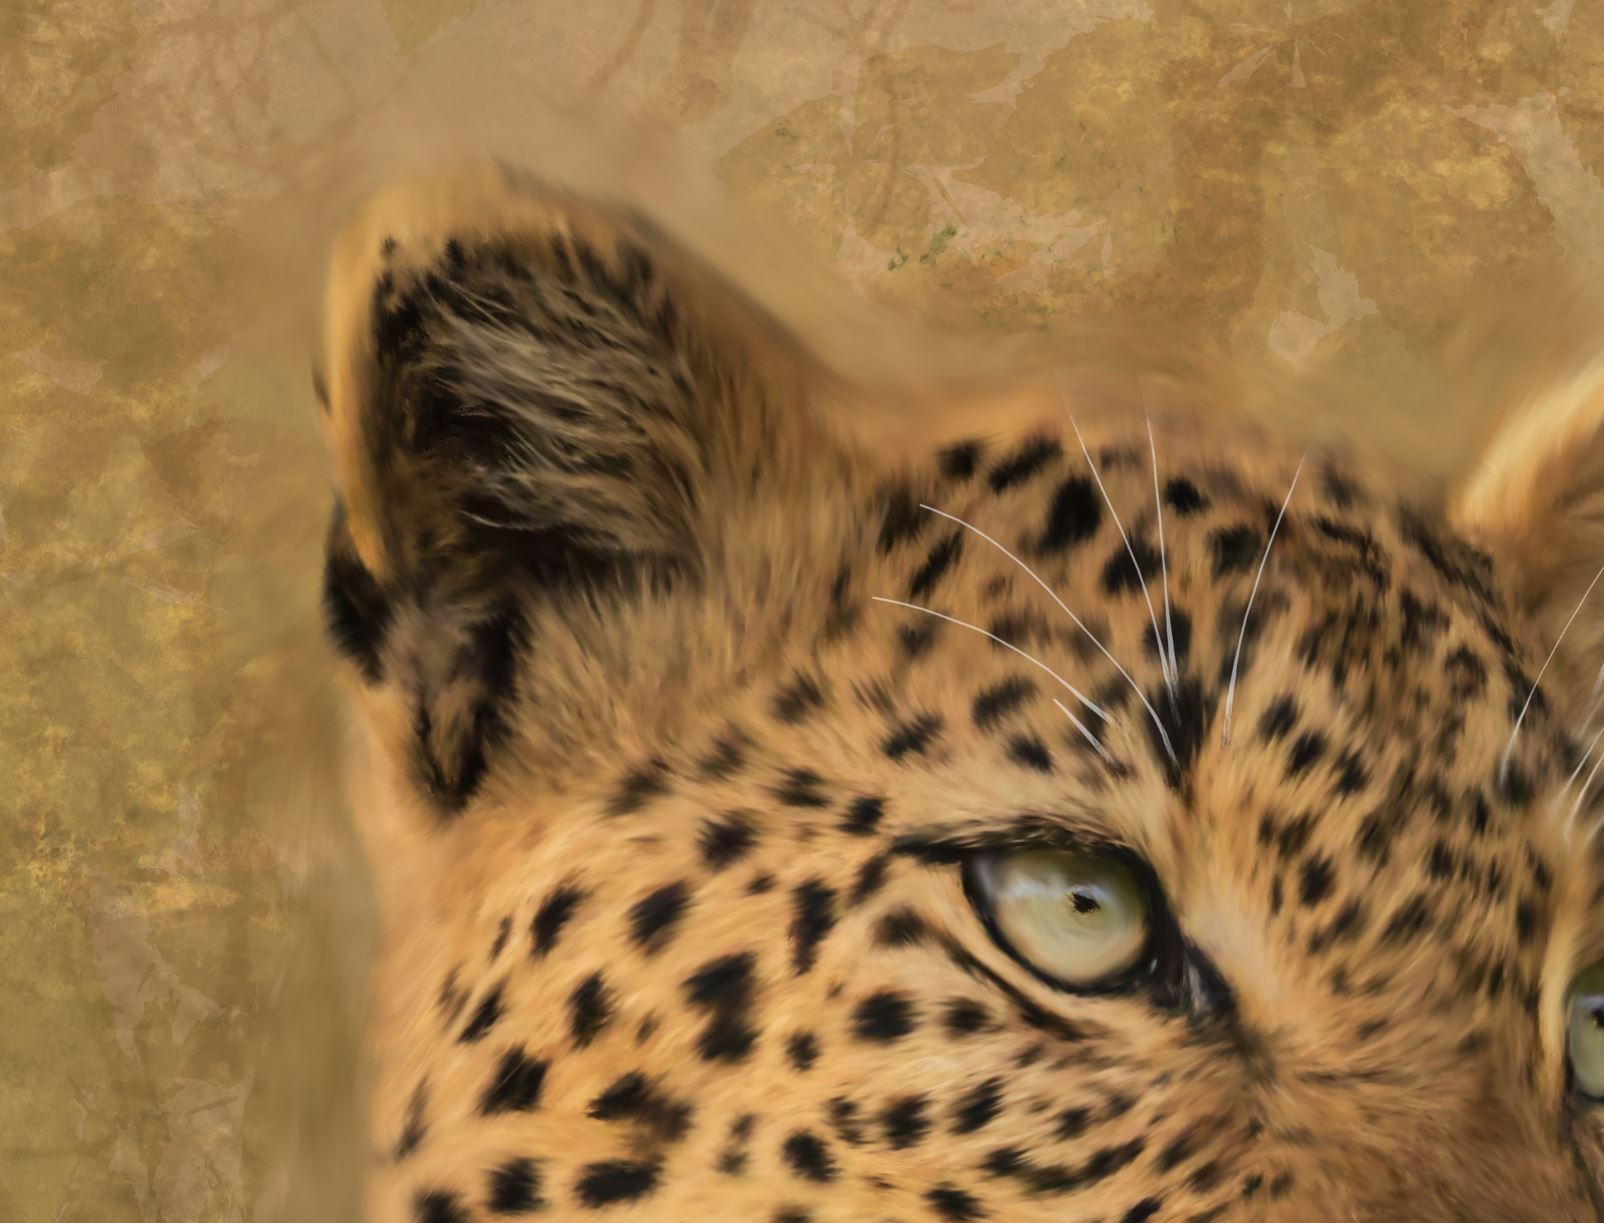
Here is a close up view of my final smudge of the leopard I did. You can see how much I destroyed the edge of the cat with this technique. That is what you want. BUT.. this is at 100% opacity.
Here is the beauty of it all.. LOWER YOUR OPACITY of this smudged layer to somewhere between 18-25%, depending on your image. You will see all the smudge goes away and you are left with just a very slight blur. And because the background was part of the blur, it’s almost seamless.
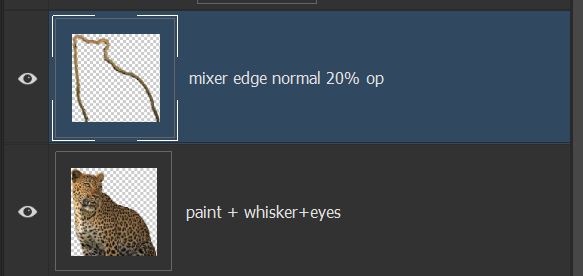
Here is the two layers in my stack from my leopard build. Note the blank layer results that I have set to 20% opacity.
You can use this technique for your paintings or your composites, it works great in both situations.
Hope you found this tutorial helpful! Now let’s go paint
NOTE:
Here are the settings on my mixer brush I use for this edge blending technique. If your processor is different, you might want to change the flow or mix a bit. You could even make it a little bit wetter, but not much. Experiment… brush behavior is crazy specific to images and machines.
#blending, #mixerbrush, #blur_edges, #cutout, #selections
#terributlerphotography,#digital_art, #fine_art, #prints, #tutorial, #art, #photomanipulation, #lesson, #mixerbrush, #mixer, #Photoshop, #painting, #photocomposite,#https://fineartamerica.com/profiles/terri-butler, #https://terributlerphotography.com/galleries-landing/, #http://shutterstock.com/g/terributlerphotography/sets, #https://stock.adobe.com/contributor/206561680/Terri


