The second series in my compositing tutorials was planned to be lighting techniques. But as I started documenting the various topics, I realized that the first thing we need to do is make sure the everyone knows a process for converting their images from day to night. Most compositors that make a dark scene begin with images capture in daylight.
The next several articles will be focused on various techniques to darken your image to a night setting so you can then use the third series of techniques for “turning on the light.” Rather than have you watch a 40-minute video of an entire composite to learn the 4 or 5 critical steps for the technique you want, my tutorials break each technique down into its elements and serve them up in short 5 to 10 minute segments so you can get right to the topic you want to learn. Once you’ve mastered the techniques, you can string them together to build your composites based on your image and your vision for your composite story. Every image and every composite is unique.
So let’s get stated with the first of three techniques we will cover to darken your scene from day-to-night.
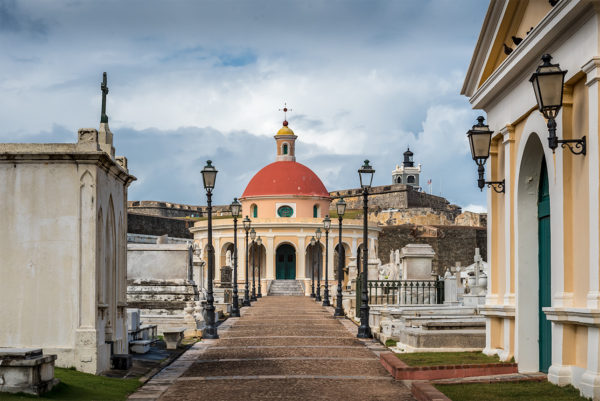
We are going to use this image.
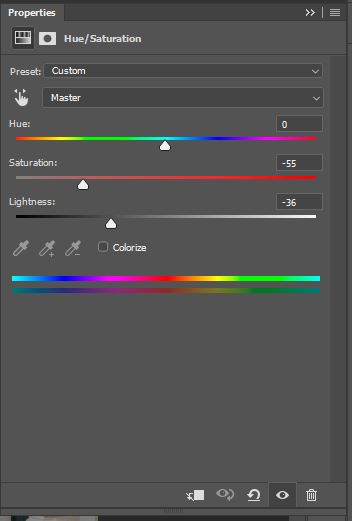
For many scene darkening techniques there are two primary adjustment layers you will use. The first is a Hue/Saturation layer.
Add this adjustment layer and lower the saturation significantly, until most of the color is gone from your image. At night, we do not see color.
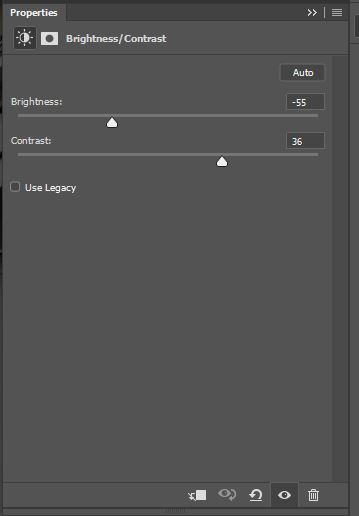
On the bottom slider, lower the lightness about half way. We will return to make fine adjustments later.
Now add the second adjustment layer, your Brightness and Contrast Layer. Again, lower your brightness at least halfway and push your contrast UP by sliding the slider to the right. My settings are here, by yours will vary based on your image.
Your image should be significantly dark at this point, and depending on your scene, you could decide NOT to include this next step for the outside moonlight look, or you might select a different gradient than the one we are going to use in this example. Again, your image and the look you are tying to achieve will dictate what you use. It’s the technique that is important here.
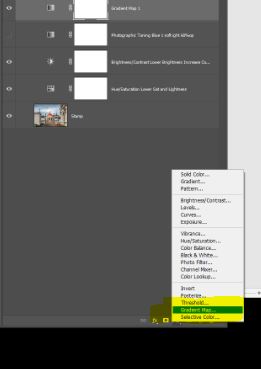
The next step is to add the Gradient. This is Gradient Map (not a gradient) which is at the bottom of your adjustment panel.
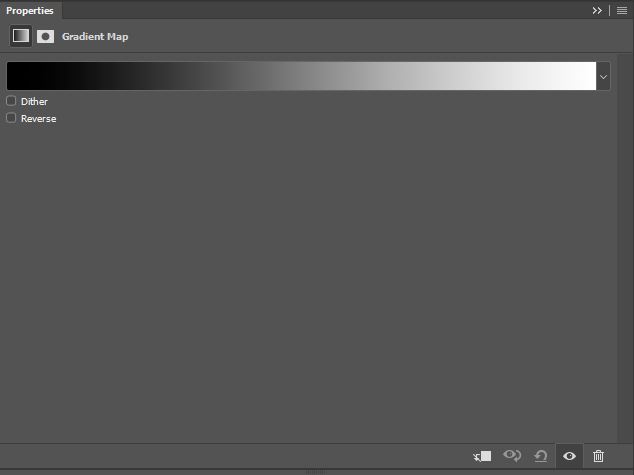
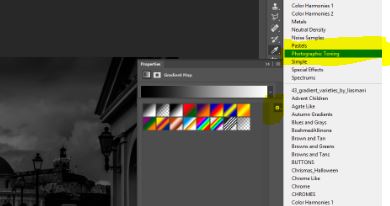
Once you add the layer you can click on the icon on the layer to open the gradient map dialogue box. We are going to load the Photographic Toning gradients that come with Photoshop.
Your gradient bar is probably set to the default of black and white. At the end of this strip is a drop-down arrow. Click on this arrow to open a second dialogue box and there will be a small gear in the upper right corner. Click on that gear to open a listing of all the gradients you have loaded to your computer.
We are going to select the Photographic Toning. You can APPEND them to the bottom of your defaults as this is a small set of gradients. 
We are going to use the BLUE 1 which is the first blue gradient after the brown ones. You can turn on the names of the gradients by returning to the gear and going to the top of the list. You have options for icons or names.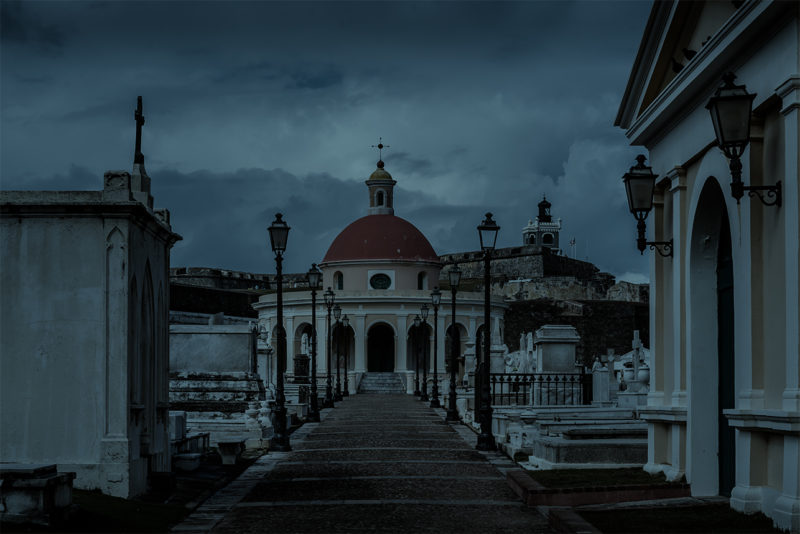 You will see that this gradient makes the scene quite blue. We can make adjustments by reducing the opacity. I have my opacity set to 60%. You can also go back and tweak your brightness and lightness on the first two adjustment until you get the right recipe for your image.
Now the one downside of this technique is that it really washes out our whites. But we can easily add a couple adjustment layers to give us the ability to add back some areas of brightness just in the key areas where we might want some more highlights, such as lunar highlights.
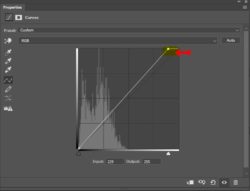 We do this with curves adjustments. In this example, I will add two different curves. The first one is for a global adjustment for the whole image to brighten the highlights, and the second will allow you to “paint back in” just the specular highlights you want. This second layer is optional depending on your image.
Add two curve layers. The first can be global, the second label extreme or specular or anything you like. On the first curve layer, open the dialogue and slide the white point to the left just a bit to bring up the whites. Your image may be different.
Now click on the second curves layer and open the dialogue for the curve and this time slide the bar to the extreme like this. BUT, on this second layer, ADD A BLACK MASK to completely hide this effect on the entire image. Then take a soft round brush with white paint and just “paint in” (ON THE black mask) the small highlights in areas that you might find those extra lunar highlights such as on metal objects, water reflections, glass, or really white areas in your image.
That’s it. You now have a basic technique to darken a scene. Try it on several images. Change the photographic toning to other gradient or depending on your image, leave it off. You can also try other gradient maps you might have in your library.
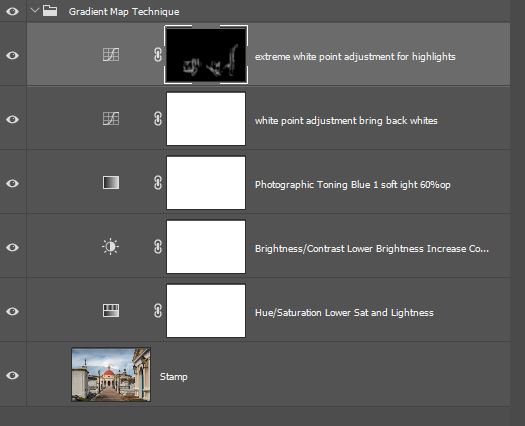
Here is my final panel.
Next Article: Turning Day to Night Using LUTs (Color Lookup Tables)
