For this third article on perspective we are going to discuss some general concepts to apply when you do not have enough information in your image to determine a horizon or vanishing point.
Sometimes we use stock images. Images may already be cutout from their background leaving no indication of leading lines to follow. When we are reviewing elements to add to our composites there are still a couple of rules we can observe to try and match the perspective of the element with the target scene’s perspective. Because we do still have some information. We know the horizon line of the scene we are building.
Armed with the knowledge of the target horizon line we can examine potential element for inclusion based on some rules about how much of an object a viewer can see depending on how close the object is to it’s horizon. For example, the cube in the center row have no top or  bottom panels visible. Elements close the horizon when viewed from eye-level, have facing panels and if turned have visible side panels, but we don’t see their top and bottoms.
The further below the horizon an element is, the more of the top of the element we can see. As evident in the bottom two rows.
An if you can see the bottom of the element, then the element is above its horizon and needs to be matched to the new composite above the horizon as well.
Let’s look at some examples:
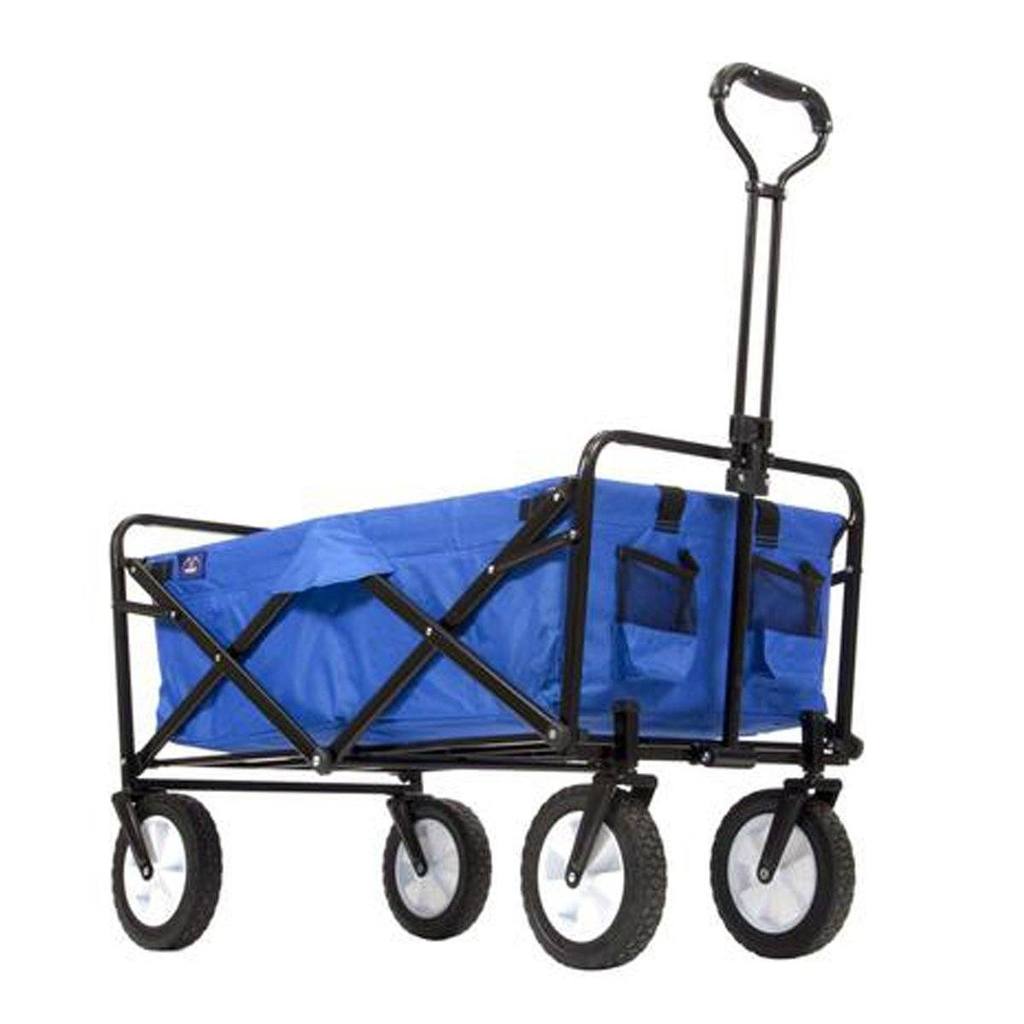
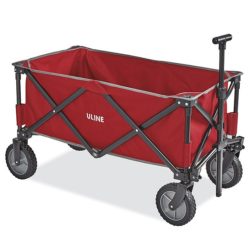

We can almost see the bottom of the blue wagon. This wagon would need to be place in a composite as an element above the scene’s horizon line to match the perspective. The red wagon on the other hand, we can see down into the bed. As we can see the “top” of the wagon the element would need to be place below the horizon line in our composite for it to look correct and in perspective.
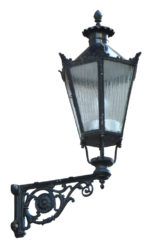
Now examine the lantern. The top of the lantern is visible. If we hung this lantern in a tree in our composite above the horizon where the viewer would perceive that you had to look up at it, the perspective would not match. The lantern would fit, but the perspective would be wrong. The next image of the lamp shows the bottom of the lamp which means this lamp needs to be place in the background above the horizon.


The barrels and the boxes in these examples have a perspective that is very close. The first barrel is a straight on view and probably needs to set right at the horizon, but the second barrel has only a small portion of the top visible and would probably fit fine at or just below the horizon. The first set of packages have very little of the top showing and they would fit in perspective closer to the horizon than the second set, which probably needs to be set below the horizon.
Fortunately, Photoshop offers several tools such as perspective warp and puppet warp to change the perspective on simple object. When you attempt to use these tools on complex object however, you end up with some interesting corners that generally require cloning work.
Hopefully these examples give you a good start on reading the perspective on elements that do not have horizons or vanishing points.
Next Article: When the Horizons Don’t Match
