Yesterday I added a post about painting with an impasto effect while building a new piece of artwork. Today’s challenge was to see if I could take a painting I already completed and ADD the impasto brush strokes on top. This would require me to find a way to build a “transparent brush” that had the 3D effect that would add on top of the original paint layer but not mix any color or shift any of the original pixels in the finished painting.
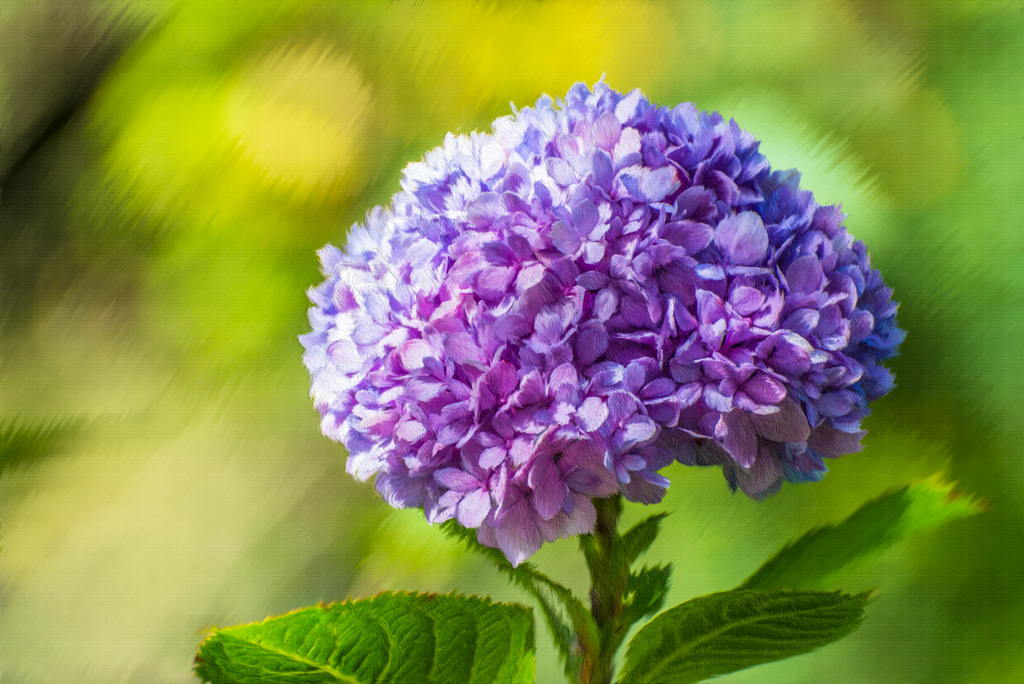
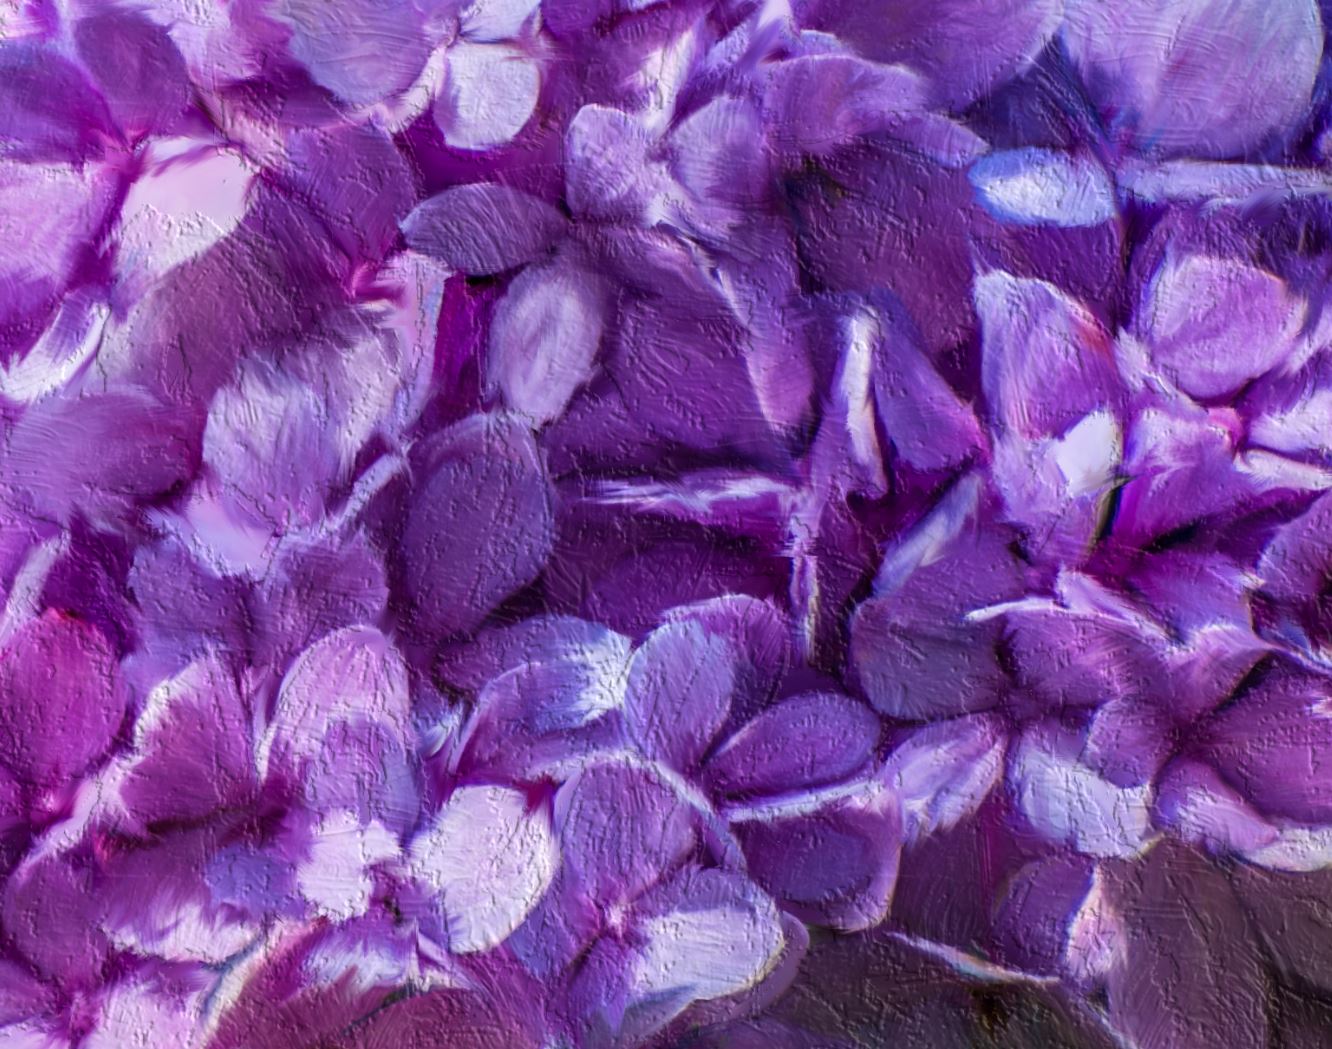
I started with a painting of a hydrangea that I did last year. This flower was painted using the mixer brush over a photo I took at the Daniel Stove Botanical Gardens in Charlotte South Carolina. I finished image had layers of painted background and painted flower. Although I had not made a selection of the flower, it was basically on it’s own layer. I wanted the flower to have the impasto feel but wanted the background to just have a canvas texture. If I had started from scratch, I would have selected the flower onto a separate layer for painting and enhancement, but for this test, I’m working with an already finished file.
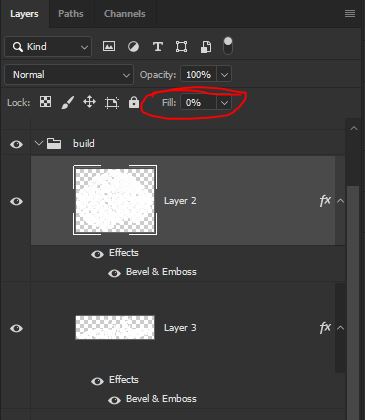 Well, here is how it’s done! I took a blank layer and put it on top of the stack. I then applied one of the impasto layer styles to the blank layer. This is essentially a bevel and emboss layer style extracted from the Michel Adamidis magic canvas file. I testing a variety of different setting such as blend modes on the brush, different blend modes on the layer, but nothing worked…. THEN I LANDED ON THE TRICK!. Reduce the Fill setting on the layer to 0% and magic… your brush is transparent for color but the layer style of the emboss comes through with the brush stroke. So any brush, in the normal mode, with the layer in the normal blend mode is fine. The magic is to reduce the fill on the layer to zero.
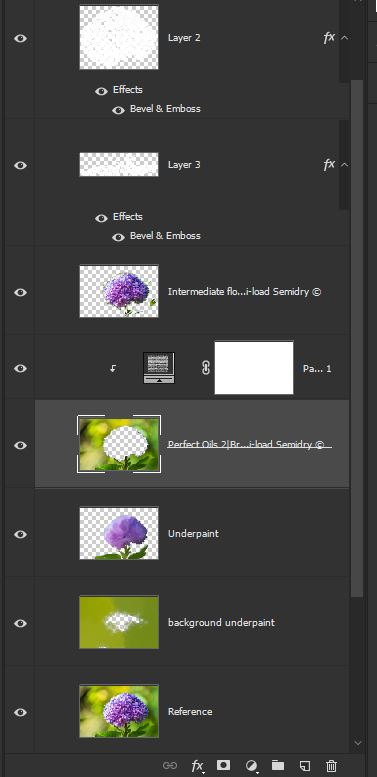
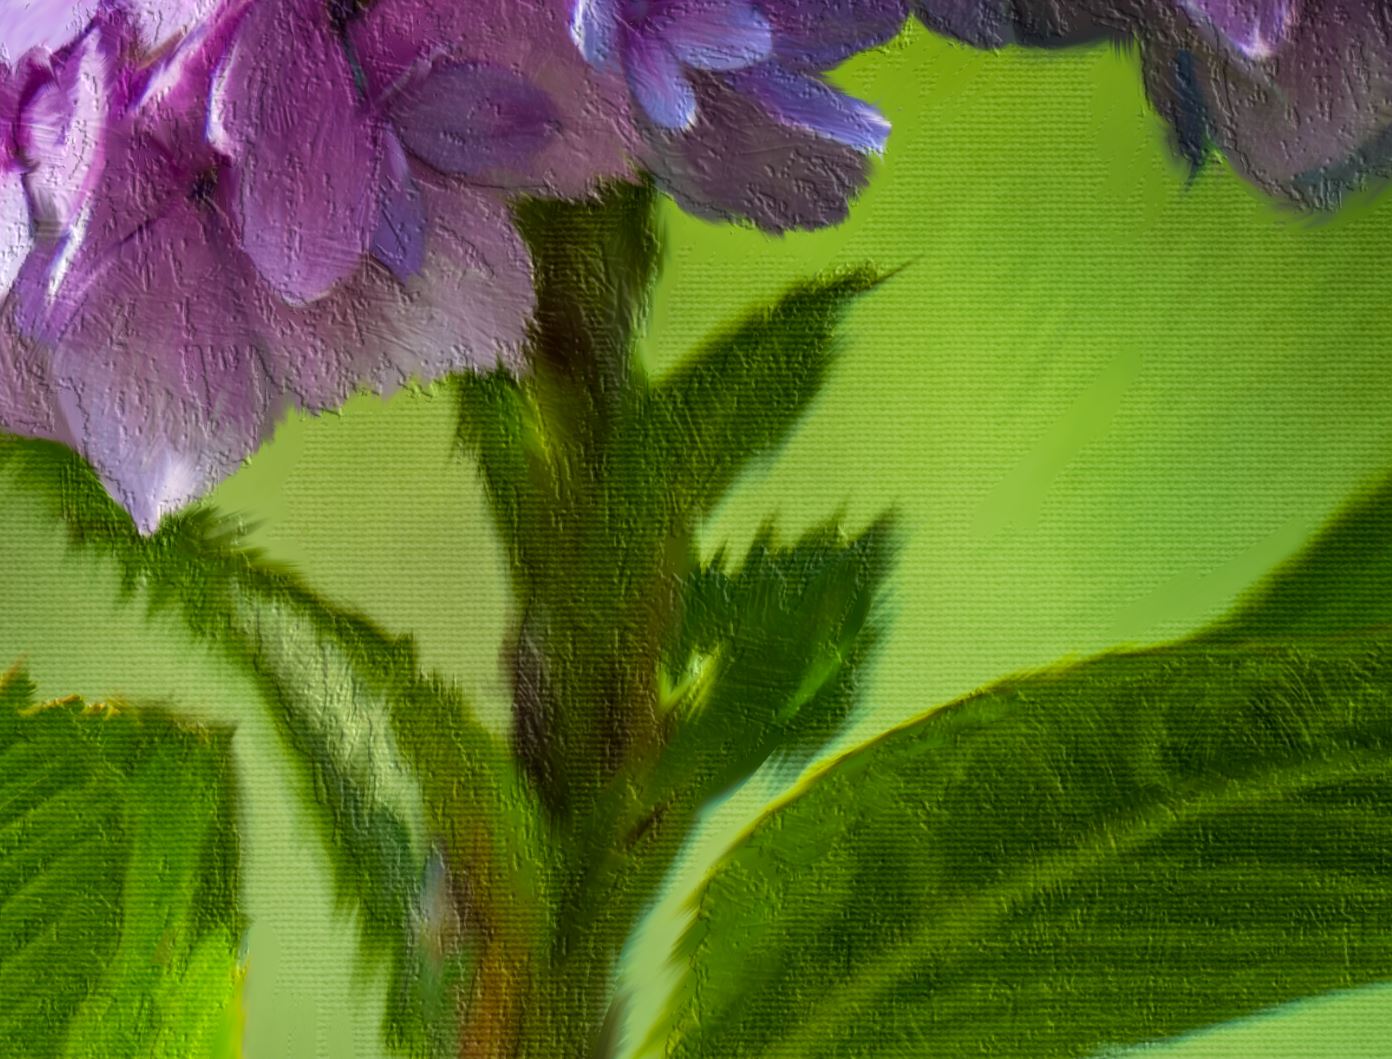
For this painting, I used one of these new layer style enhance layers for the flower and another for the stems and leaves. I left the flower at full depth on the emboss settings and went into the style settings and reduced the depth on the emboss for the leaves and stems, so the effect was not as intense.
I also wanted to add a slight canvas feel to the background. So I added a pattern fill layer with a canvas texture and located the best place within the stack to put it. I clipped it to the background intermediate painting layer. This applied the canvas effect to just the background and not to the flower painting on top.
Here is the order of my layers in my Photoshop file. and a couple of close up views of the final painting.
terributlerphotography,#digital_art, #fine_art, #prints, #wallart, #art, #photomanipulation, #photocomposite, #http://shutterstock.com/g/terributlerphotography/sets, #https://stock.adobe.com/contributor/206561680/Terri
