This article is the third technique in the series of turning day-to-night. In this technique, we are going to touch on a few more complicated concepts of using smart filters, loading a luminosity mask from the channel panels and making adjustment to a curve adjustment mask in addition to a curve layer. So let’s get started!
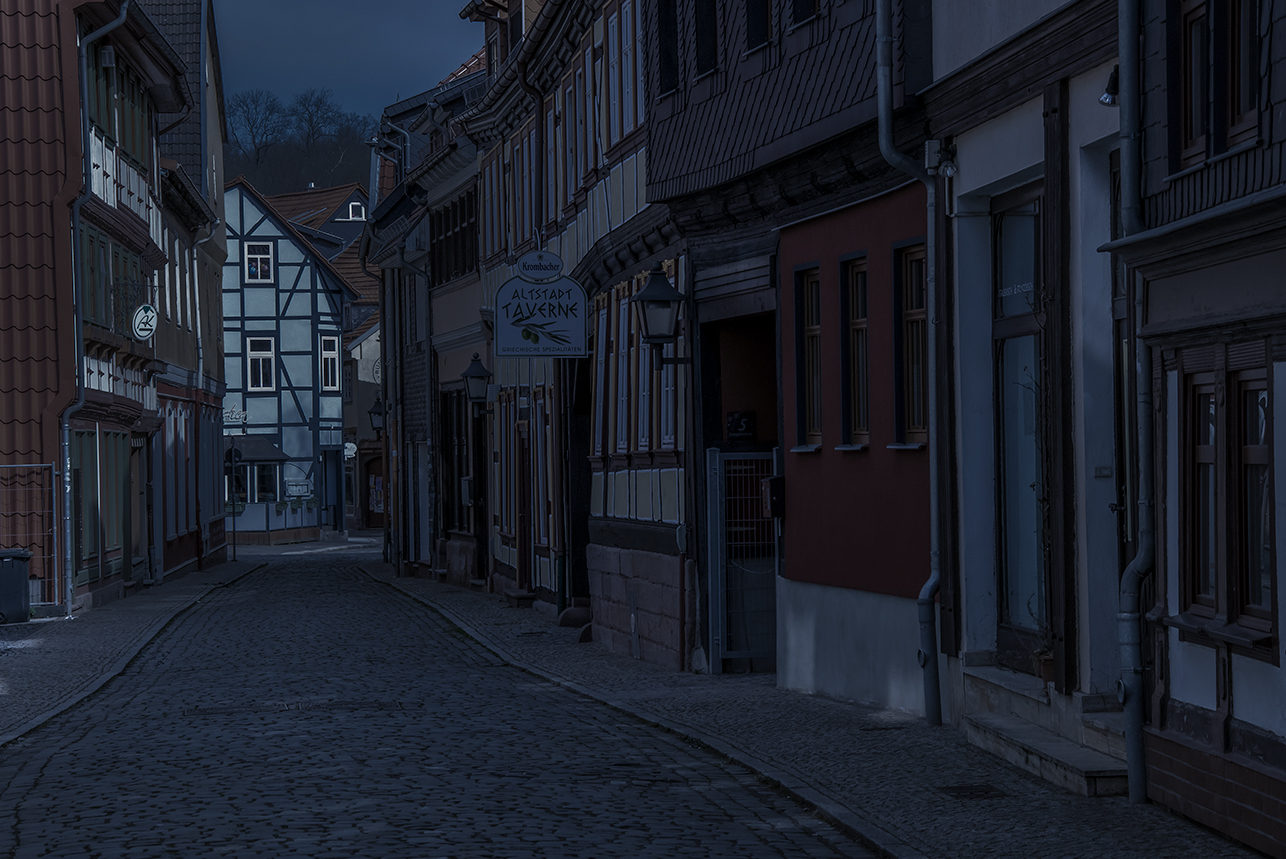
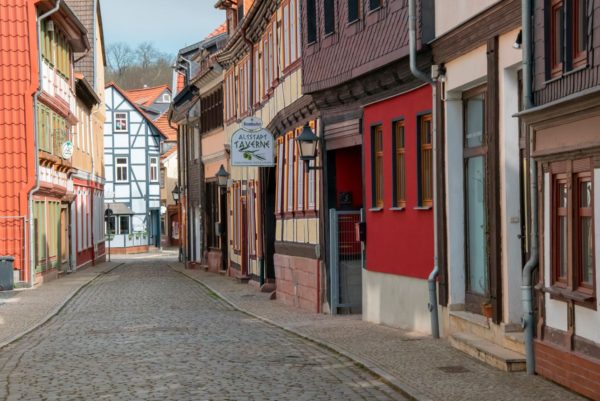 For this topic, we will use this stock image. And before we begin the process of turning the day to night, we are going to learn how to build our mask.
Later in the editing process, we are going to need a mask that targets just the VERY BRIGHTNESS highlights in this image, the whites on the building at the end of the street and the building on the left.
Trying to paint in those details with a brush to mask them with a curves layer would be very difficult. But what if we could target them based on how bright they are?
The reality is that there is an entire genre of editing in Photoshop that does exactly that. It’s called luminosity masking. There are several products on the market that help you learn and use luminosity controls to edit your images. We will get to the luminosity topic much later in our compositing training, but today, we are going to “dip our toes” in just one technique to help with editing day-to-night images. In the appendix of this article I will list some resources I use for luminosity editing if you are interested in investigating this topic further.
To build our mask, click on and duplicate the layer (Ctrl+J). Select the duplicate layer and then on your tabs across the top of your panel, click on your Channels tab. ![]() If you don’t see the word “Channels”, then go to your Menu to the word “Window” and open the drop down and click on the word Channels. Once in Channels you will see 4 layers, the RGB channel, the Red, Green and Blue channels We are going to load the RGB layer as a selection. We can load these one of two ways. First, you can hold down the Ctrl key and click on the picture on the RGB layer. You should see the marching ants around your image in the image area. The second way to load the selection is to click on the small dashed circle on the bottom tray of this panel. It’s the first icon of 4 in the bottom right corner. Choice just one technique. Once you have the marching ants around your image, click back on the Layers tab and return to your normal editing panel.
If you don’t see the word “Channels”, then go to your Menu to the word “Window” and open the drop down and click on the word Channels. Once in Channels you will see 4 layers, the RGB channel, the Red, Green and Blue channels We are going to load the RGB layer as a selection. We can load these one of two ways. First, you can hold down the Ctrl key and click on the picture on the RGB layer. You should see the marching ants around your image in the image area. The second way to load the selection is to click on the small dashed circle on the bottom tray of this panel. It’s the first icon of 4 in the bottom right corner. Choice just one technique. Once you have the marching ants around your image, click back on the Layers tab and return to your normal editing panel.
 With our marching ant’s still marching, go down to your adjustment circle, open the adjustment panel and click on Curves. The
 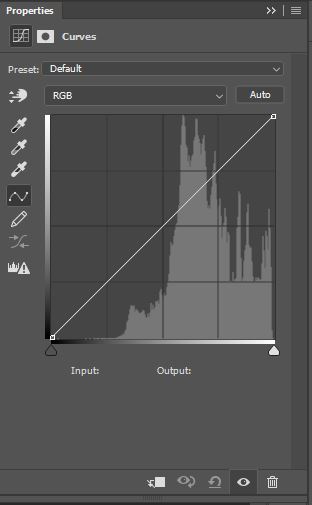 selection will become a black and white mask on a curves layer and the curves dialogue box will be open. CLOSE the dialogue box, we don’t need it for this step. We are going to work directly on the MASK.
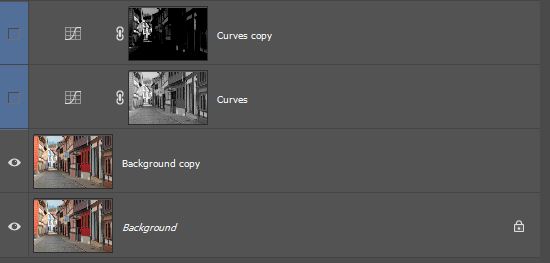
For safety, we are going to make a copy of this layer. Once you have more practice at editing masks, you may not want to do this, but for now, we will keep a backup copy just in case we want to use it again. The reason for this back up is that the next step we are going to take on this mask would be considered “destructive editing” as there is no readjustment available. Thus, the backup just in case we want to build another one. You will see what I mean in just a minute.
So Ctrl +J to make a copy of this curves layer with the luminosity mask that we built in the Channels panel.
Now select the copy of this layer and SELECT THE MASK. Make sure your white border is surrounding your mask, not the curve adjustment icon. Hold down the ALT/OPT key and click on the mask. Your image is now displaying that black and white mask instead of the colored image.
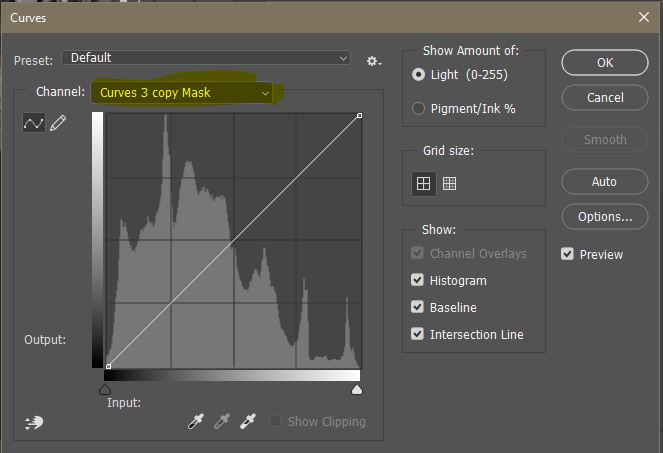
Here is the “can’t go back step”. Staying with your selection on the MASK, hit Ctrl+M (the shortcut) to bring up the curves dialogue box. You will notice that we DID NOT ADD A LAYER. We are editing directly on the existing layer. You will know you are on the mask of your layer because the name will display in the curve dialogue box.
The alternate way to edit directly on a layer other than the shortcut we used would be to go to your menu and select IMAGE ->ADJUSTMENT->CURVES.
** NOTE** Anytime you use the menu with IMAGE->ADJUSTMENT you are working DIRECTLY ON THE EXISTING LAYER and this is DESTRUCTIVE EDITING. Under normal circumstances this should be avoided. When you use this technique, you should be working on a copy of your layer so you have a backup.
We are now going to darken this mask so that only our BRIGHTEST WHITES remain. This mask will be used later in our workflow.
To complete this, grab the small black triangle in the bottom left corner and drag it to the right. Watch your image. When only the very bright whites remain, stop. For this image I stopped at about 133 input leaving some gray in other areas of the image.
Now TURN OFF BOTH the original and this modified mask layer. We don’t need them right now. Let’s return to editing our image to turn it day-to-night. We had to build the mask while we were still using the day image, because building the luminosity mask on the night image would not produce good results.
Your panel should look like this. I’ve made my two working layers blue so I know they are not part of my workflow. In my normal workflow I would put them at the bottom in a resource folder.
Click on your Background copy. We are going to turn it into a smart object because we are going to apply a filter. It is always a good practice to convert your layer to a smart object before applying a filter so that you can re-open the filter and make adjustments. If you apply a filter to a regular layer (not a smart object) then the filter is applied directly and is permanent, you cannot make further adjustments.
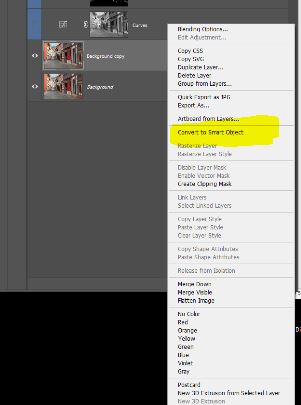 To convert to a smart object, right click anywhere on the layer to the right of the layer’s title and you will open the dialogue box. Click on “convert to smart object.”
While on this layer, go to the menu to FILTER -> CAMERA RAW FILTER and your image will open in the ACR (adobe camera raw) image processor. This is the same engine that runs Lightroom although the interface is different.
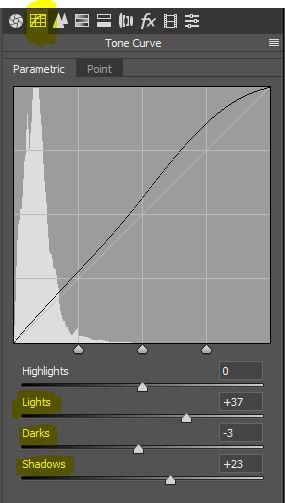
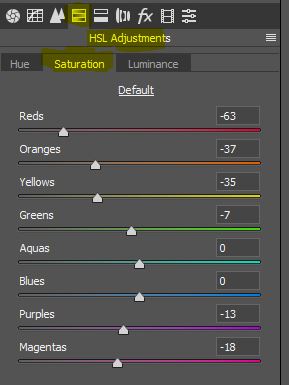
While in ACR we are going to make several adjustments to the basic panel as well as to the Tone curve and we are going to make some additional adjustments to the luminosity and saturations in our HSL panel.
Here are my settings.
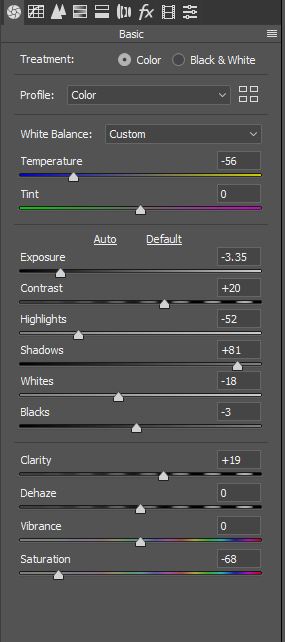

At this point, like the other two processes we learned, our whites are pretty washed out and we need a way to recover the whites without brightening the entire image. Now is where we get to use that mask we built in the beginning of the lesson. Because it targets the whites!
 A this point I feel the image is TOO DARK so I returned to the ACR to lift the exposure across the entire image. Because we used a smart object, just click on layer to make that layer active and then double click on the work
Camera Raw Filter and it will OPEN the ACR again for you. Slide the exposure slider to the right a bit until you lighten the entire image. I changed from -3.3 to about -2.85.
Now to target those whites. Add a curves layer. Watch your whites in the image as you drag down the adjustment at the highlight end of the curve. Don’t worry about the rest of the image, we are going to mask out everything but our whites. Drag down to darken them or push up to lighten them depending on your image.
Now go to our resource layer, the mask we built at the beginning of the lesson. Click on the curve layer with our darkened “whites only” mask to make it active. Click on the mask. Make sure you are on the mask and the white selection border is around the mask and not the curve icon.
 Now HOLD DOWN THE ALT/OPT key and drag this mask UP TO THE TOP and place it on the curve layer you just built to modify your whites. When you drop it on top of the existing white mask, you will get a message: “Replace Layer Mask?” Click YES
Now look at your image again. That curves adjustment you made is only affecting the whites that are allowed to show through the mask; the very bright whites. Now that the mask is in place you can fine tune the curve adjustment by clicking on the icon again and adjusting the whites as needed. That’s it! Day to Night using Adobe Camera Raw and Adjustment layers.
Here is the final panel

APPENDIX
Luminosity Mask
I use the luminosity tools developed by Tony Kupyer and have used his tools since about 2007. He continues to develop new and creative tools for editing with luminosity and saturation and while others have entered the industry, I found no reason to change.
You can download a very basic panel of his for free on the Photoshop extensions library just to test it out, but if you are serious about the concept of luminosity mask editing, you will want to invest in his Rapid Panel, it’s not very expensive. While I have several of his tools, I really only use the Rapid Mask panel in my workflow but you might like several of his tools if you are a Photoshop novice as he brings several Photoshop tools together in custom panels that help new users. Us old timers just memorize the shortcuts.
* * * * * * * * * * * * * * * * * * * * * * * * * * * * * * * *
Tony’s MiniPanel is here:
https://www.adobeexchange.com/creativecloud.details.12130.html
BUT, his site is giving away the Basic V6 panel here, so I would recommend you start with this:
http://goodlight.us/panels-and-videos.html
Tutorials are here: http://goodlight.us/writing/tutorials.html and also on YouTube
* * * * * * * * * * * * * * * * * * * * * * * * * * * * * * * *
Another photography doing a lot with luminosity is Greg Benz and his free panel is here on adobe.
https://www.adobeexchange.com/creativecloud.details.12468.html
Greg’s Tutorials and a free panel on his site. I don’t know if it’s the same one on Adobe.
https://gregbenzphotography.com/luminosity-masking-tutorial/
I’ve read some of his articles on his site, but his material overlaps Tony’s so I generally don’t follow him.
* * * * * * * * * * * * * * * * * * * * * * * * * * * * * * * *
You should check out both and decide what techniques you like. The tools and interfaces are a bit different. After 12+ years of using a tool I didn’t want to change.
![]()
For the YouTube Video of this Post
