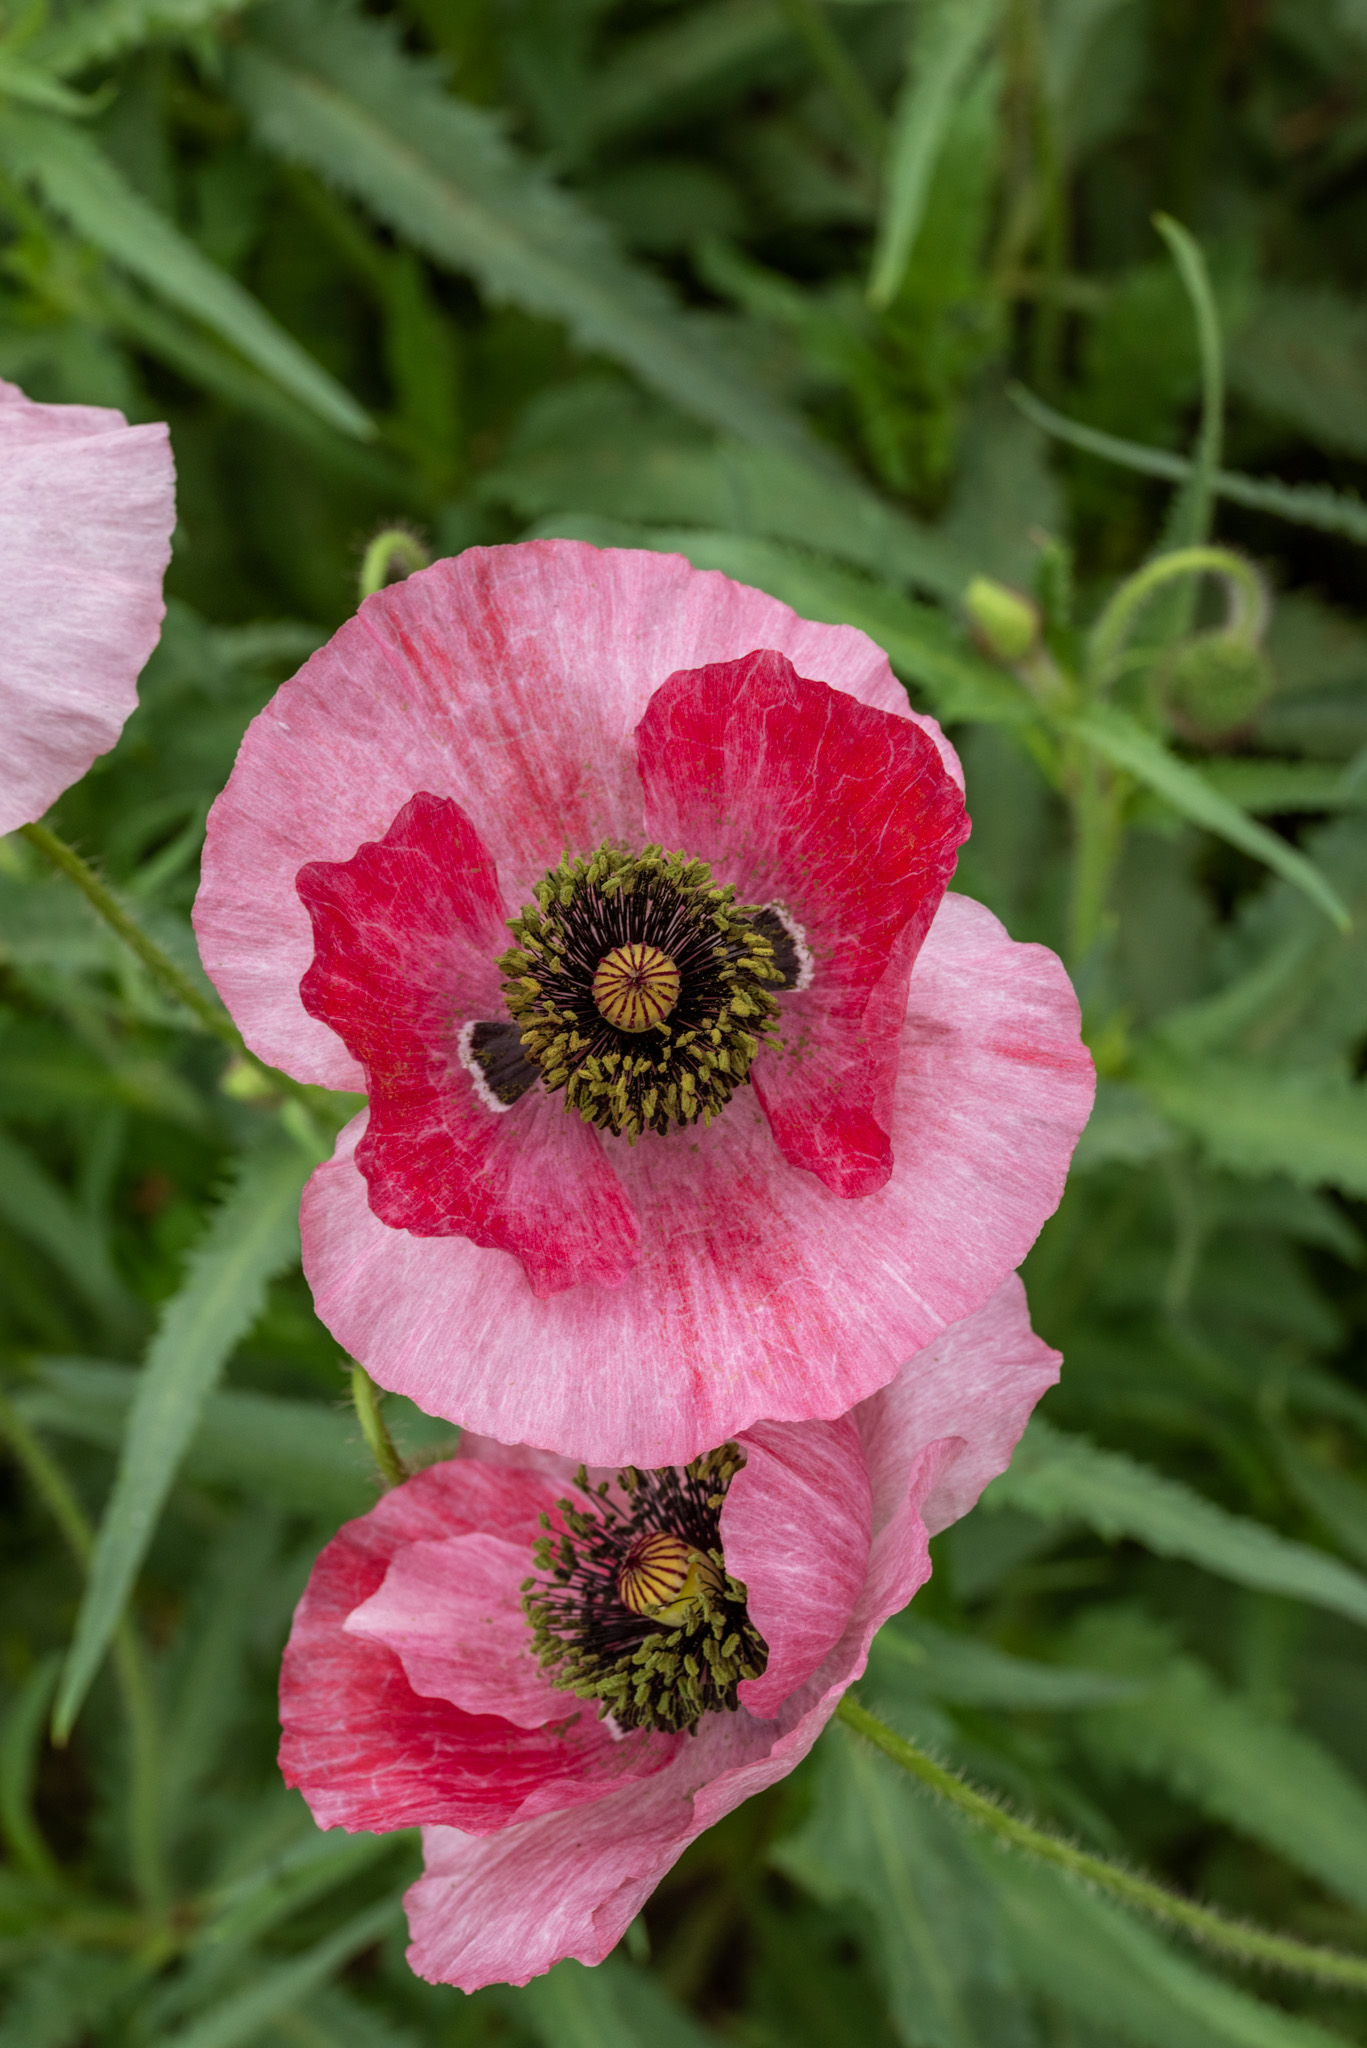
This art piece is a digital painting from an original image I captured in the spring in Castroville, Texas at a location we call the “Poppy House”. Every year the owner opens his yard to photographers and guest to come take photos of his beautiful poppies. A small donation is requested which helps maintain the historical buildings on the property or is donated to local veteran groups.
My first step was to go into Photoshop and center the image by adding canvas and using the content aware fill tool to get the flower in a good position, and remove the parts of the background I didn’t want to use. (see starter image below)
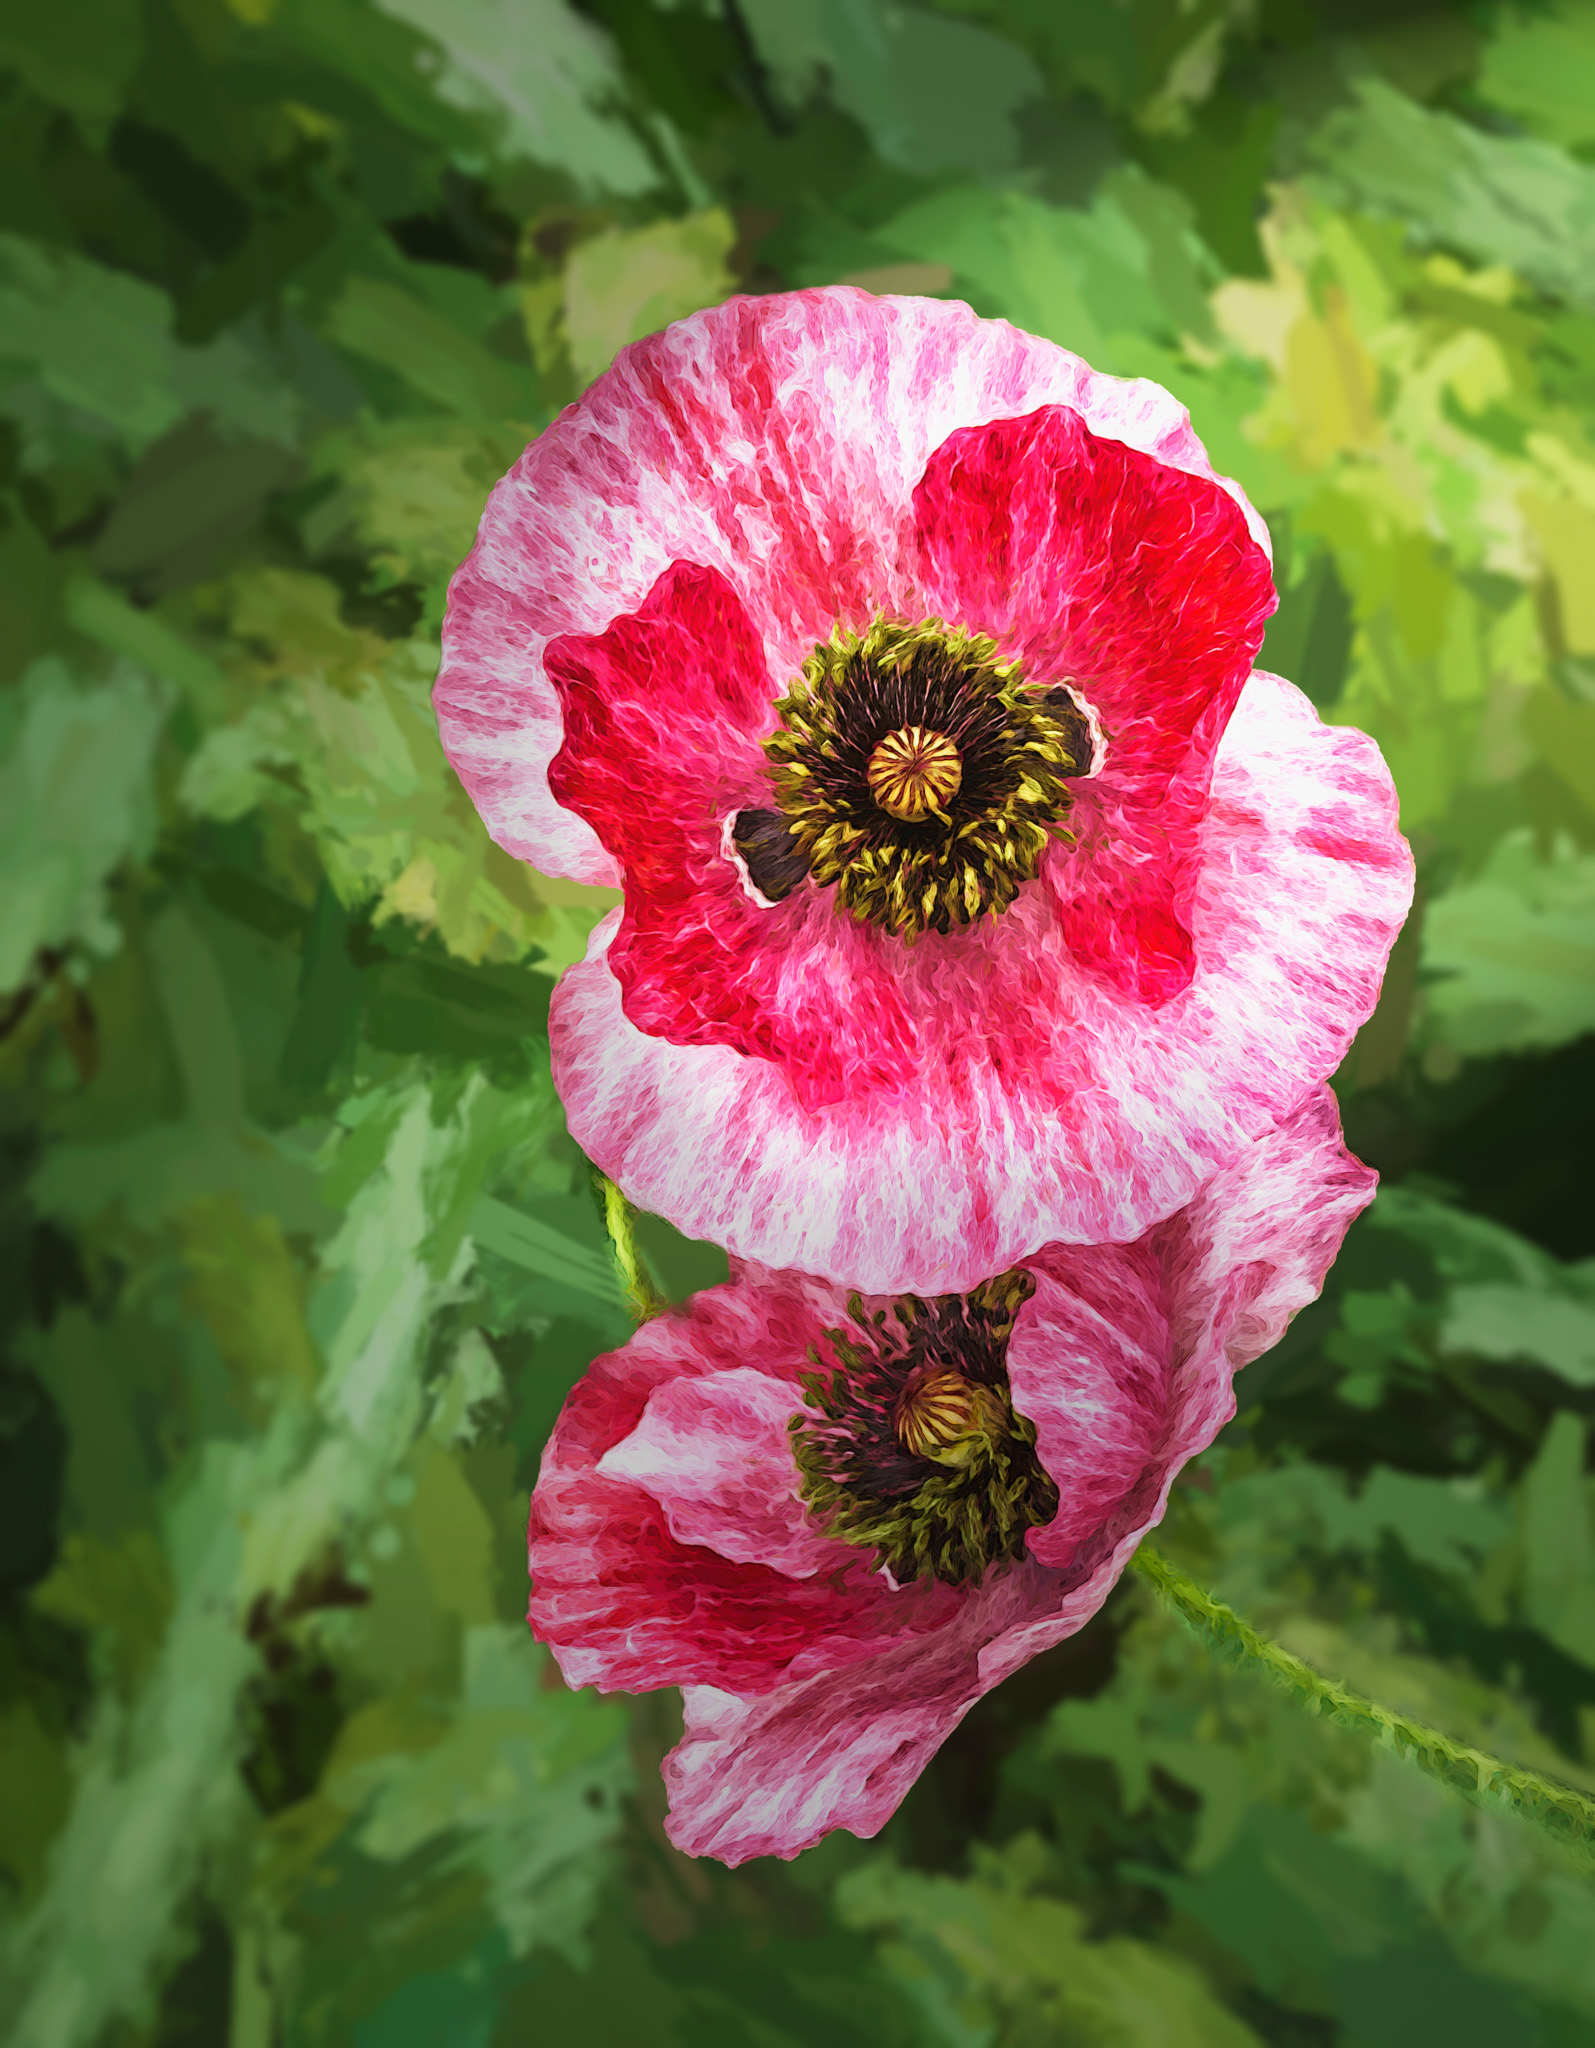
This image is finished with a few different tools. I first took the image into NIK Color Effects Pro and applied my recipe for painting preparation with includes the Tonal Contrast, Pro Contrast and Detail Extraction effects. As each image is unique, I apply a starter recipe and then make adjustments as needed.
I then separated the flower from the background, and sent them through Topaz impressions, using different techniques for the background and the flower and stem. I took the background layer and built a single layer with the effect, cloning in where the flower should be with content aware fill in Photoshop. Putting the layer into a smart object, I added a gaussian blur and the iris blur to get the effect I wanted for my background.
For the flower layer, after coming back out of Topaz impressions with a unique flower technique I developed for my wildflower images, I masked out the background from this layer so the previous blurred background would show through.
To enhance the flower, I took the cutout of the flower on a duplicate layer and put it through the “Glowing Edge” filter with settings of 2, 14, 15. I then inverted it to colored lines on white. Using Ctrl+U for the Hue/Sat tool I lightened it a bit and desaturated it just a bit. I then put this in the Linear Burn blend mode over the flower to really pop those veins and the texture of the flower, lowering the opacity as needed.
This was the end of the “build phase”, I was now ready for lighting. I did a bit of dodge and burning on the flower to further enhance the texture of the petal veins. On a merged copy I added the “Render Lighting” spot light from the upper right corner. I also added a layer with just a cut out of the flower and made a level adjustment to further enhance the lighting on the upper right corner.
A final levels and curves adjustment for global lighting and contrast and I can count this one done!
Here is the starting image.
terributlerphotography,#digital_art, #fine_art, #prints, #wallart, #art, #photomanipulation, #photocomposite, #http://shutterstock.com/g/terributlerphotography/sets, #https://stock.adobe.com/contributor/206561680/Terri
