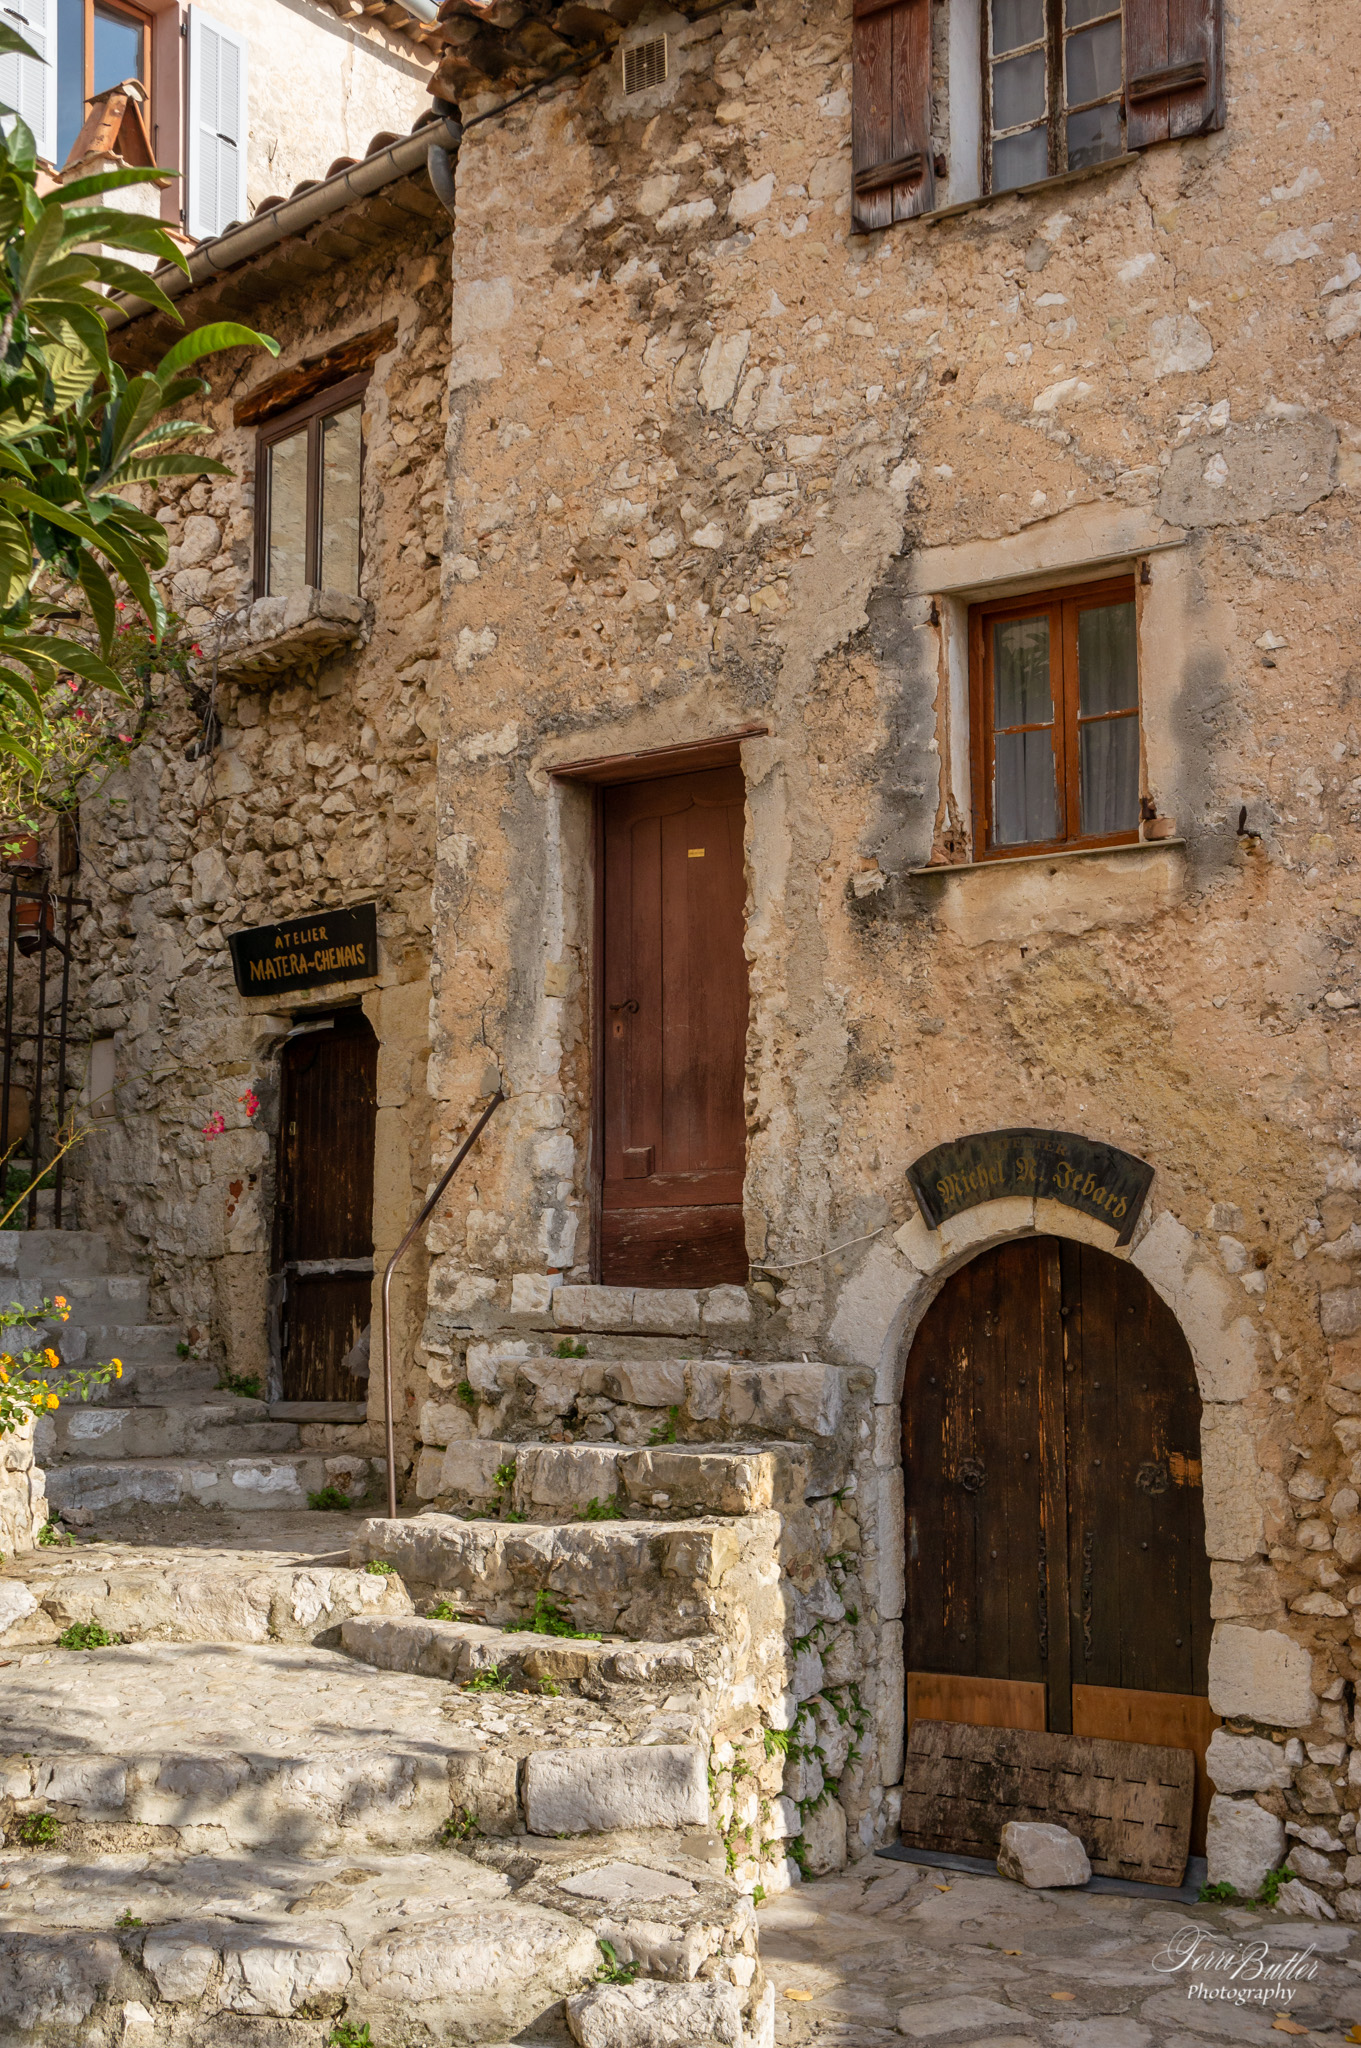
Back in 2011 we took a cruise out of Venice Italy down the coast of Croatia and around the boot and back to Rome. We stopped at Split, Dubrovnik, Malta, Taormina Sicily, then to Florence, Monaco, Nice and a small medieval village called Eze in France. This image is a digital painting of a courtyard image from Eze.
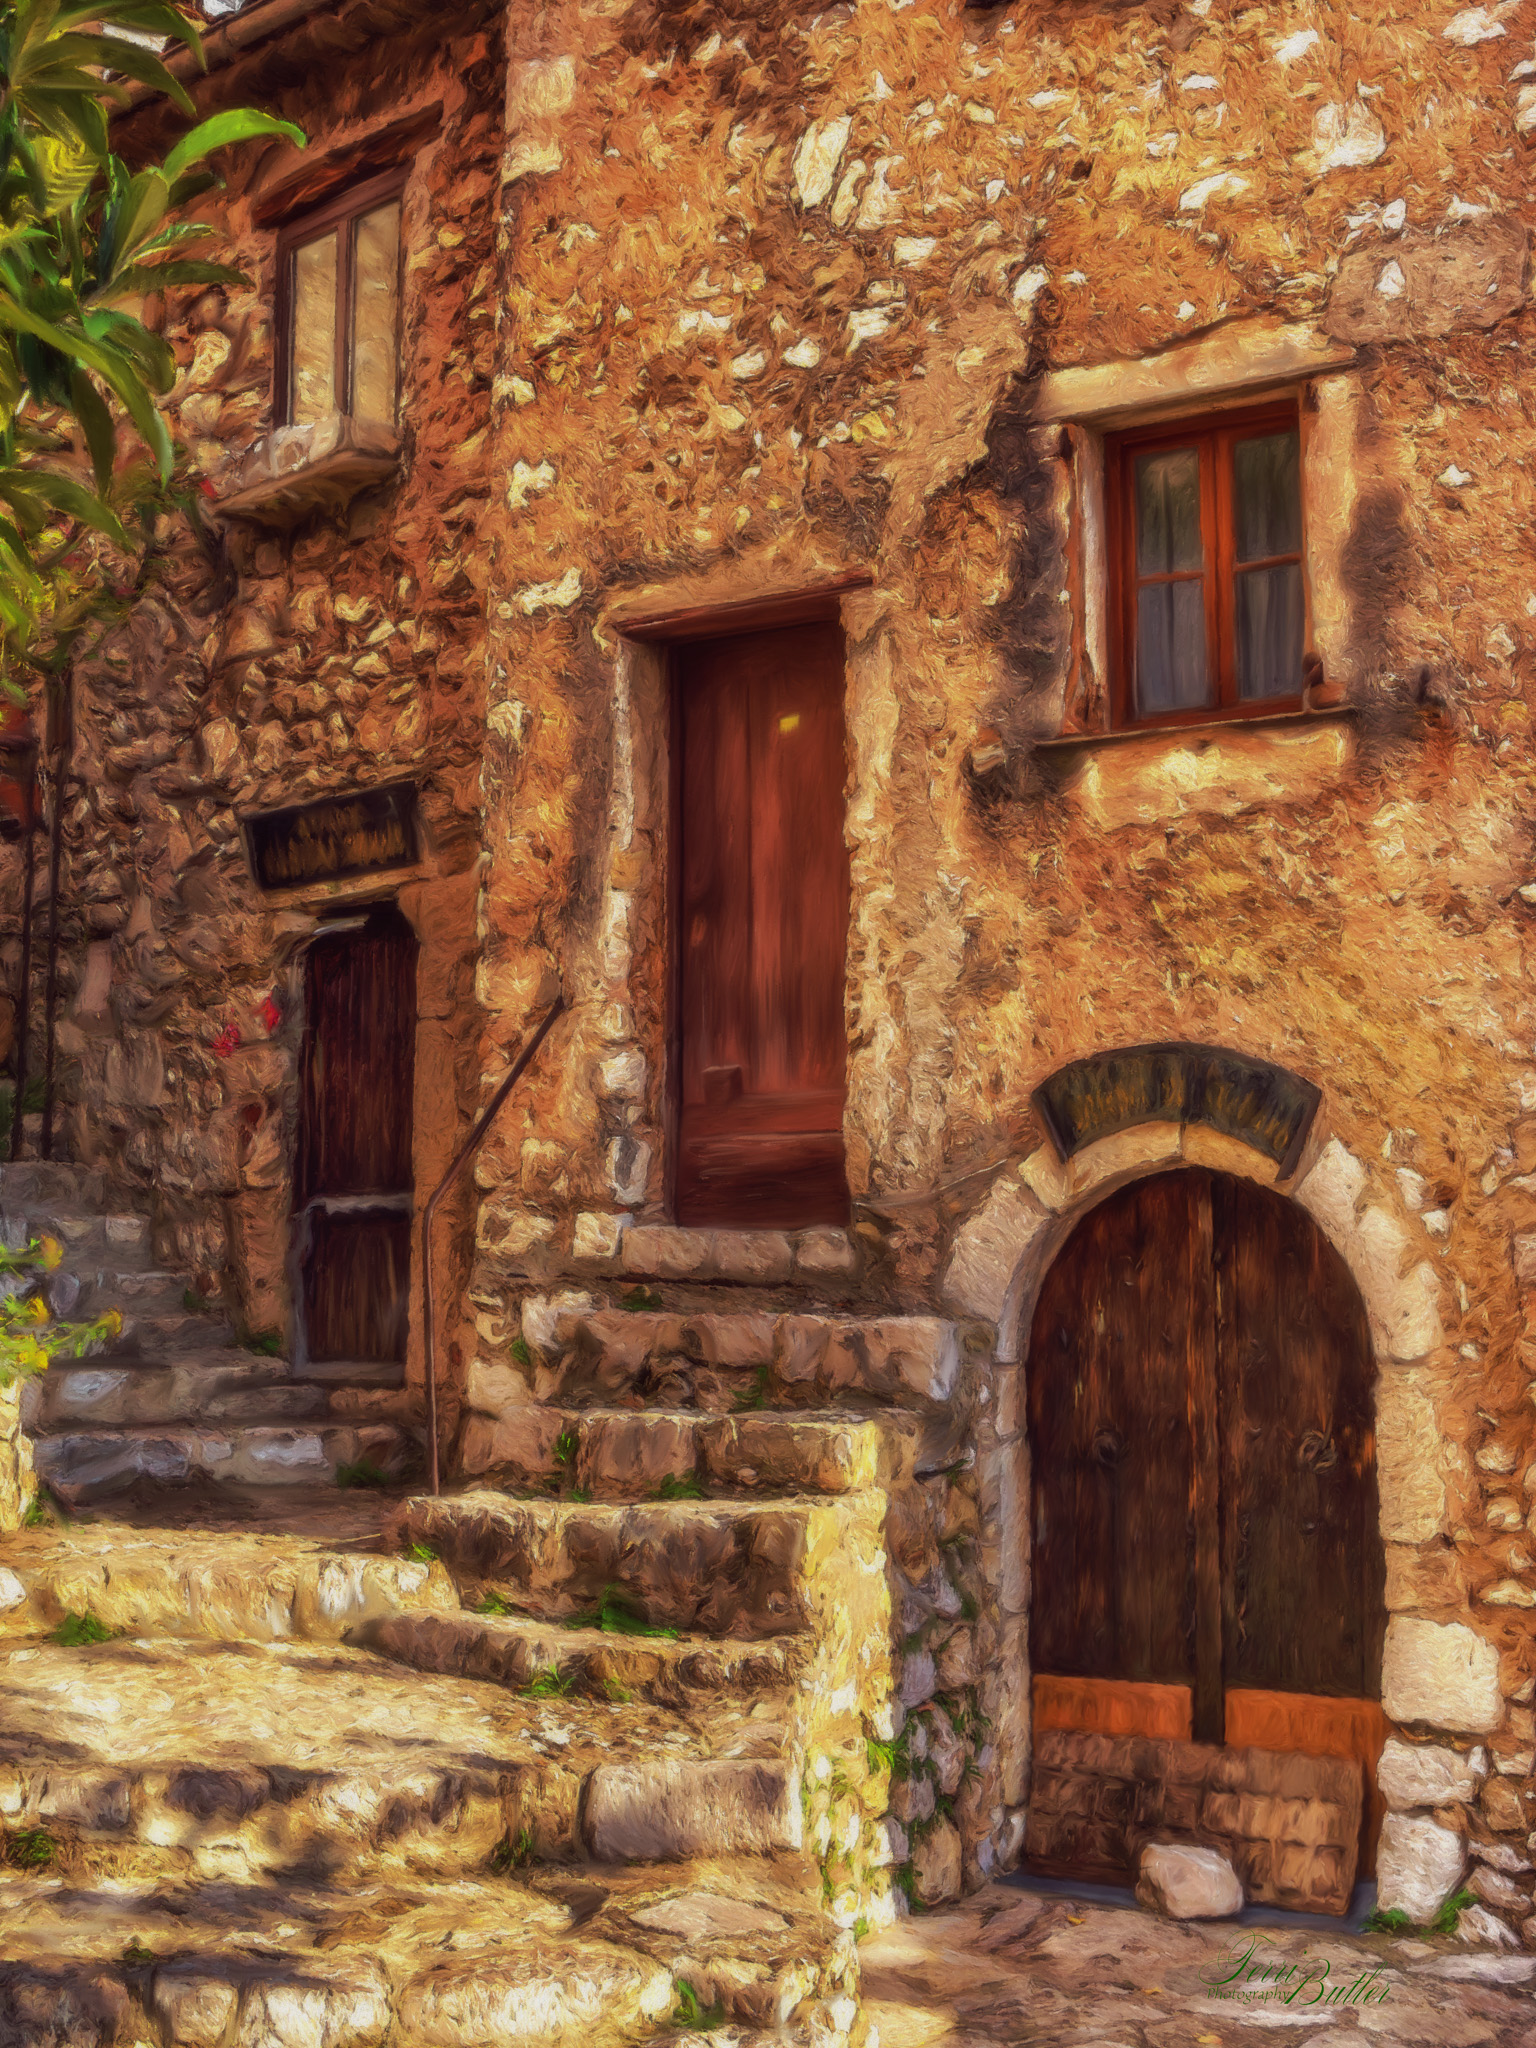
I started with my painting recipe in Color Efex Pro with Tonal Contrast, Detail Extraction and Pro Contrast, making appropriate adjustments for this image. I then went to Topaz. I wanted this image to have a very rough painterly effect with all the rocks and the vintage medieval feel so I designed my settings to give me more of a dry brush finish. I saved my settings to a preset called “Italy” as I probably will use this one again.
Because I had the spill and smudge setting turned on in Topaz Impressions, I blurred a lot of my edges which I wanted a bit sharper. So I took a copy of the original image and put it through the “Glowing Edge” filter with settings of 2, 13, 15, inverted to lines on white, de-saturated the colors with Ctrl+U, used levels (Ctrl+L) to balance it to black and white. Sometimes I make a second copy in the multiply mode to enhance the lines and merge the two lines. Another way to get rid of the grey is to put a second copy over it in the vivid light blend mode.
I merged my line layers and then put a third copy over the topaz layer and put it in the color burn mode at about 25%. This completed my build phase and gave me the image I need to finish. I’m now ready to do mixer painting and lighting.
The topaz layer is too canned for my taste, so I really need to “paint” out some of the effect and add the more realistic brush strokes to the image. I do this with the mixer brush. Many mixer brushes as set to “sample all layers” but this really takes a lot of resources from your machine. I learned a technique several years ago that will produce a blank layer of you entire image with 100% of the image embedded into the layer at 1% opacity. This allow you to use the mixer brush on a single layer and you can work extremely fast without any drag on your brush. I call this layer my 1% mixer layer and I’ve just built a little action to build it for me whenever I need it. The recipe for building one is at the bottom of this post.
After painting with the mixer the areas I wanted to blend I was ready for lighting. I added a brightness and contrast layer for global adjustments first. Next, I needed to tone down the brights without impacting the midtones and shadows. The best way to do this is with a luminosity mask. I use TK Rapid Mask. I have been using Tony’s luminosity tools for years! I did a levels mask of my light 3s and then lowered the density lifted the midtone point on the light 3’s I took away those harsh highlights. I then did some dodging an burning with my curves adjustment technique (totally non destructive and total control) and then adjustment the vibrance in areas. Burning tends to over saturate especially the yellows and oranges.
Next step was color grading. I generally use LUTs for color grading. I have several and I tend to play with a two layer recipe until I get what I’m looking for. This image had two LUTs on it; (1) one to take down the yellows and one to give me more of the old world vintage look. Both are applied with opacities below 50%. I also put another global curve adjustment on top of the color grading to pop the contrast.
My last and final step on all my composites and paintings is my blur effect. It’s a combination of a gaussian blur of the merged visible and a copy of the merged visible in soft light mode. It just brings the consistency of the image together, especially if you are compositing.
Add the signature and this one is done!
ORIGINAL IMAGE
MIXER 1% technique
- Make a copy of your work at the top of your stack that is a merged version of everything. (Merge visible)
- Duplicate this merged layer – this is your source layer. Set the opacity of this layer to 1%
- Add a blank layer on top and name it Mixer 1% (this layer is 100% opacity)
- Now select your source layer and your blank mixer layer and merge them (Crtl+E)
- The resulting layer looks empty… but take a mixer brush… turn off everything else to prove that that 100% of your image is embedded in this layer… begin to paint with a mixer brush WITHOUT sample all layers turned on. You will see that the source image is there. All of it… 100% opacity and 100% saturation and luminosity. – Magic!
terributlerphotography,#digital_art, #fine_art, #prints, #wallart, #art, #photomanipulation, #photocomposite,#https://fineartamerica.com/profiles/terri-butler, #https://terributlerphotography.com/galleries-landing/, #http://shutterstock.com/g/terributlerphotography/sets, #https://stock.adobe.com/contributor/206561680/Terri
