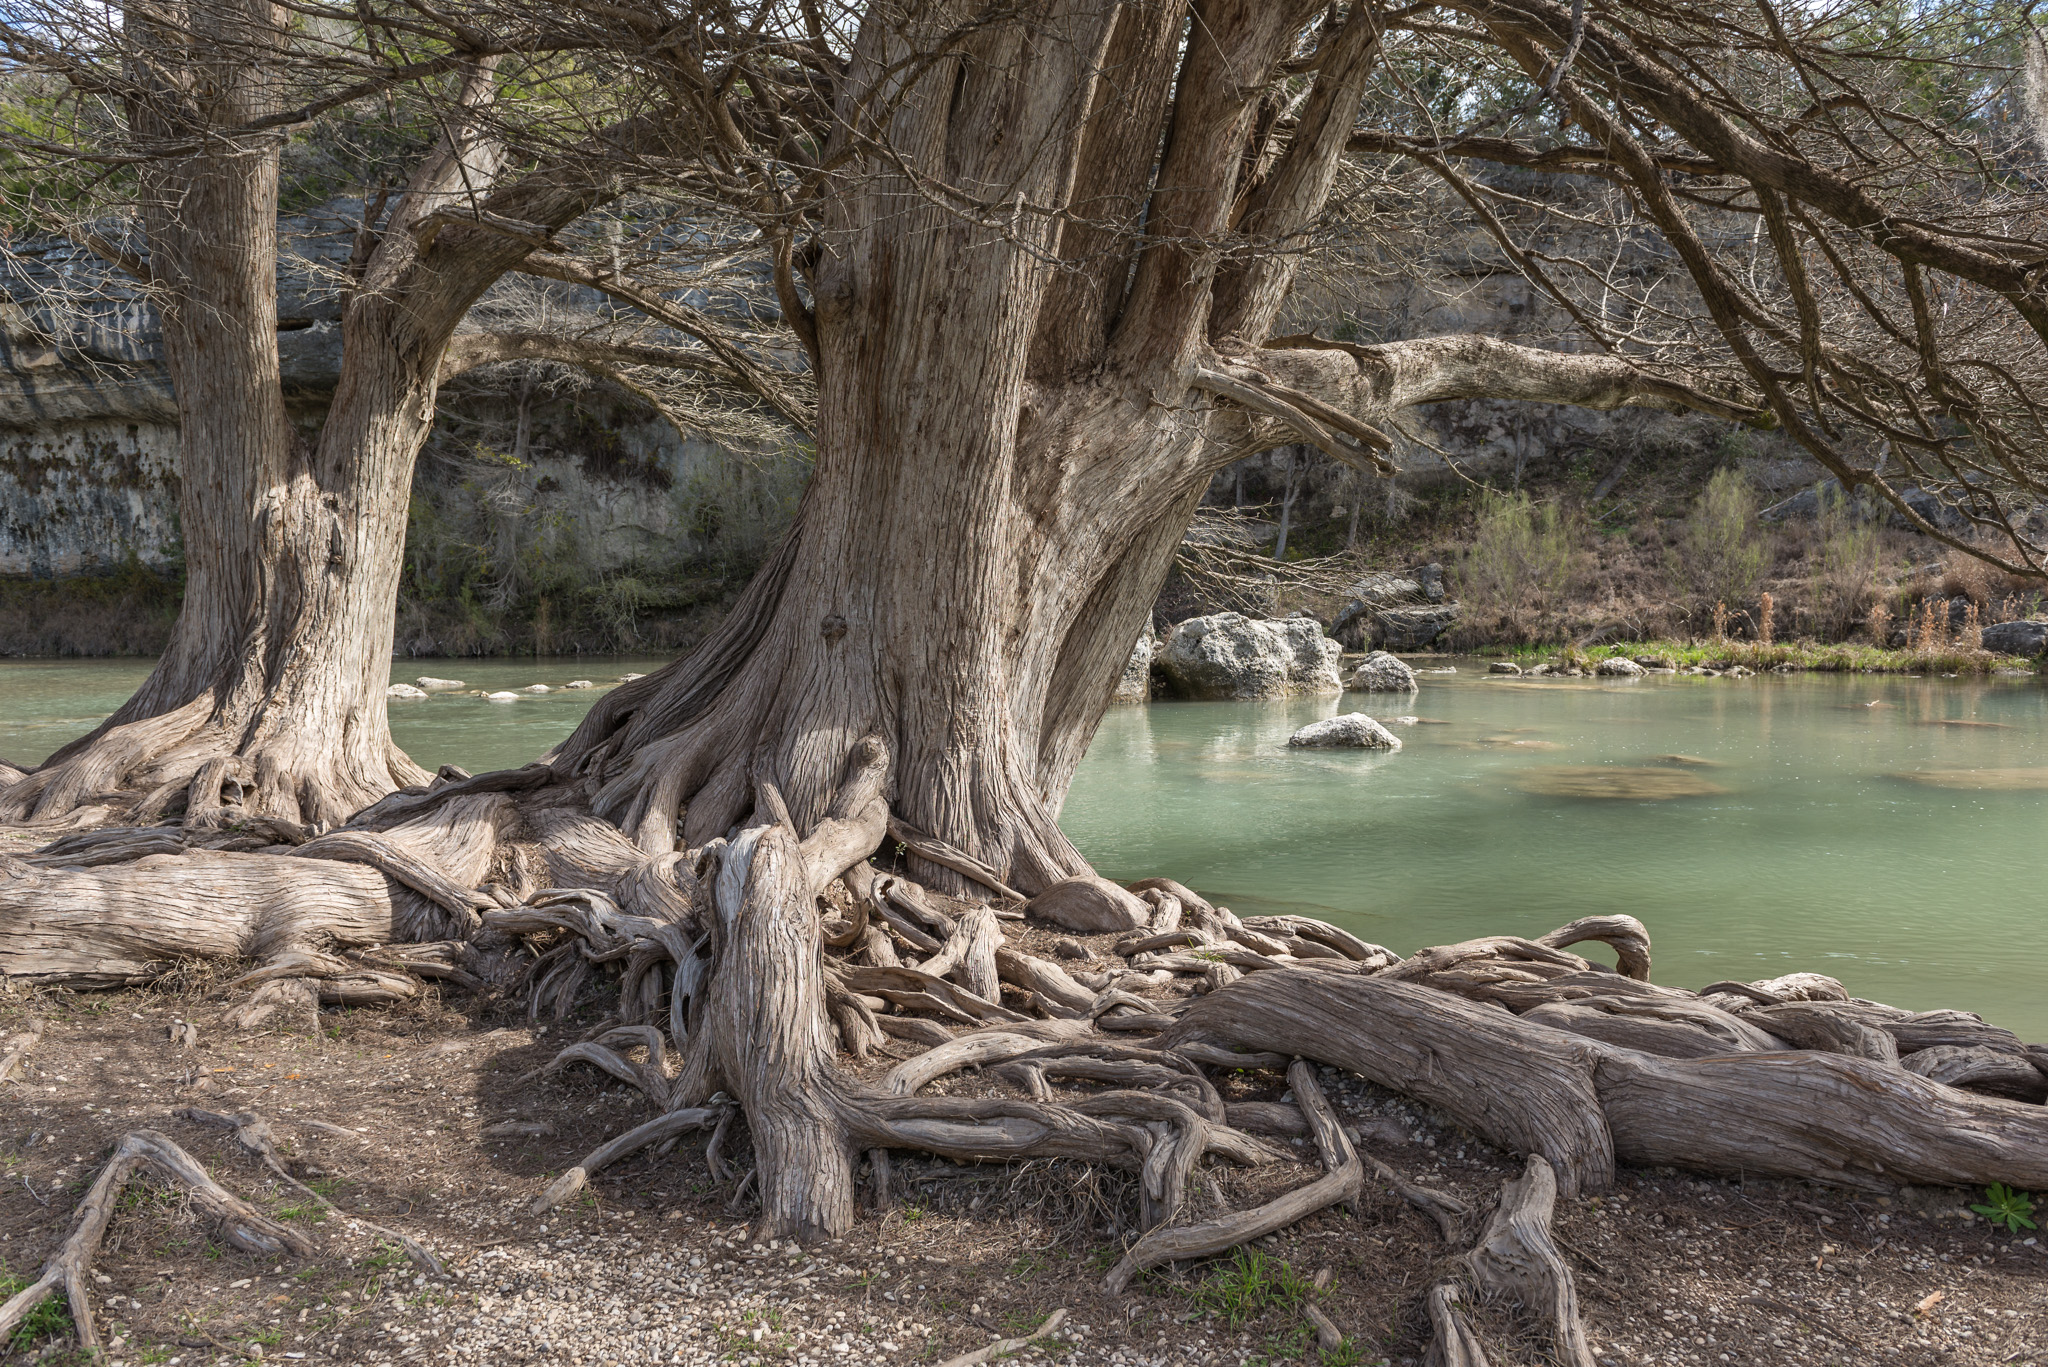
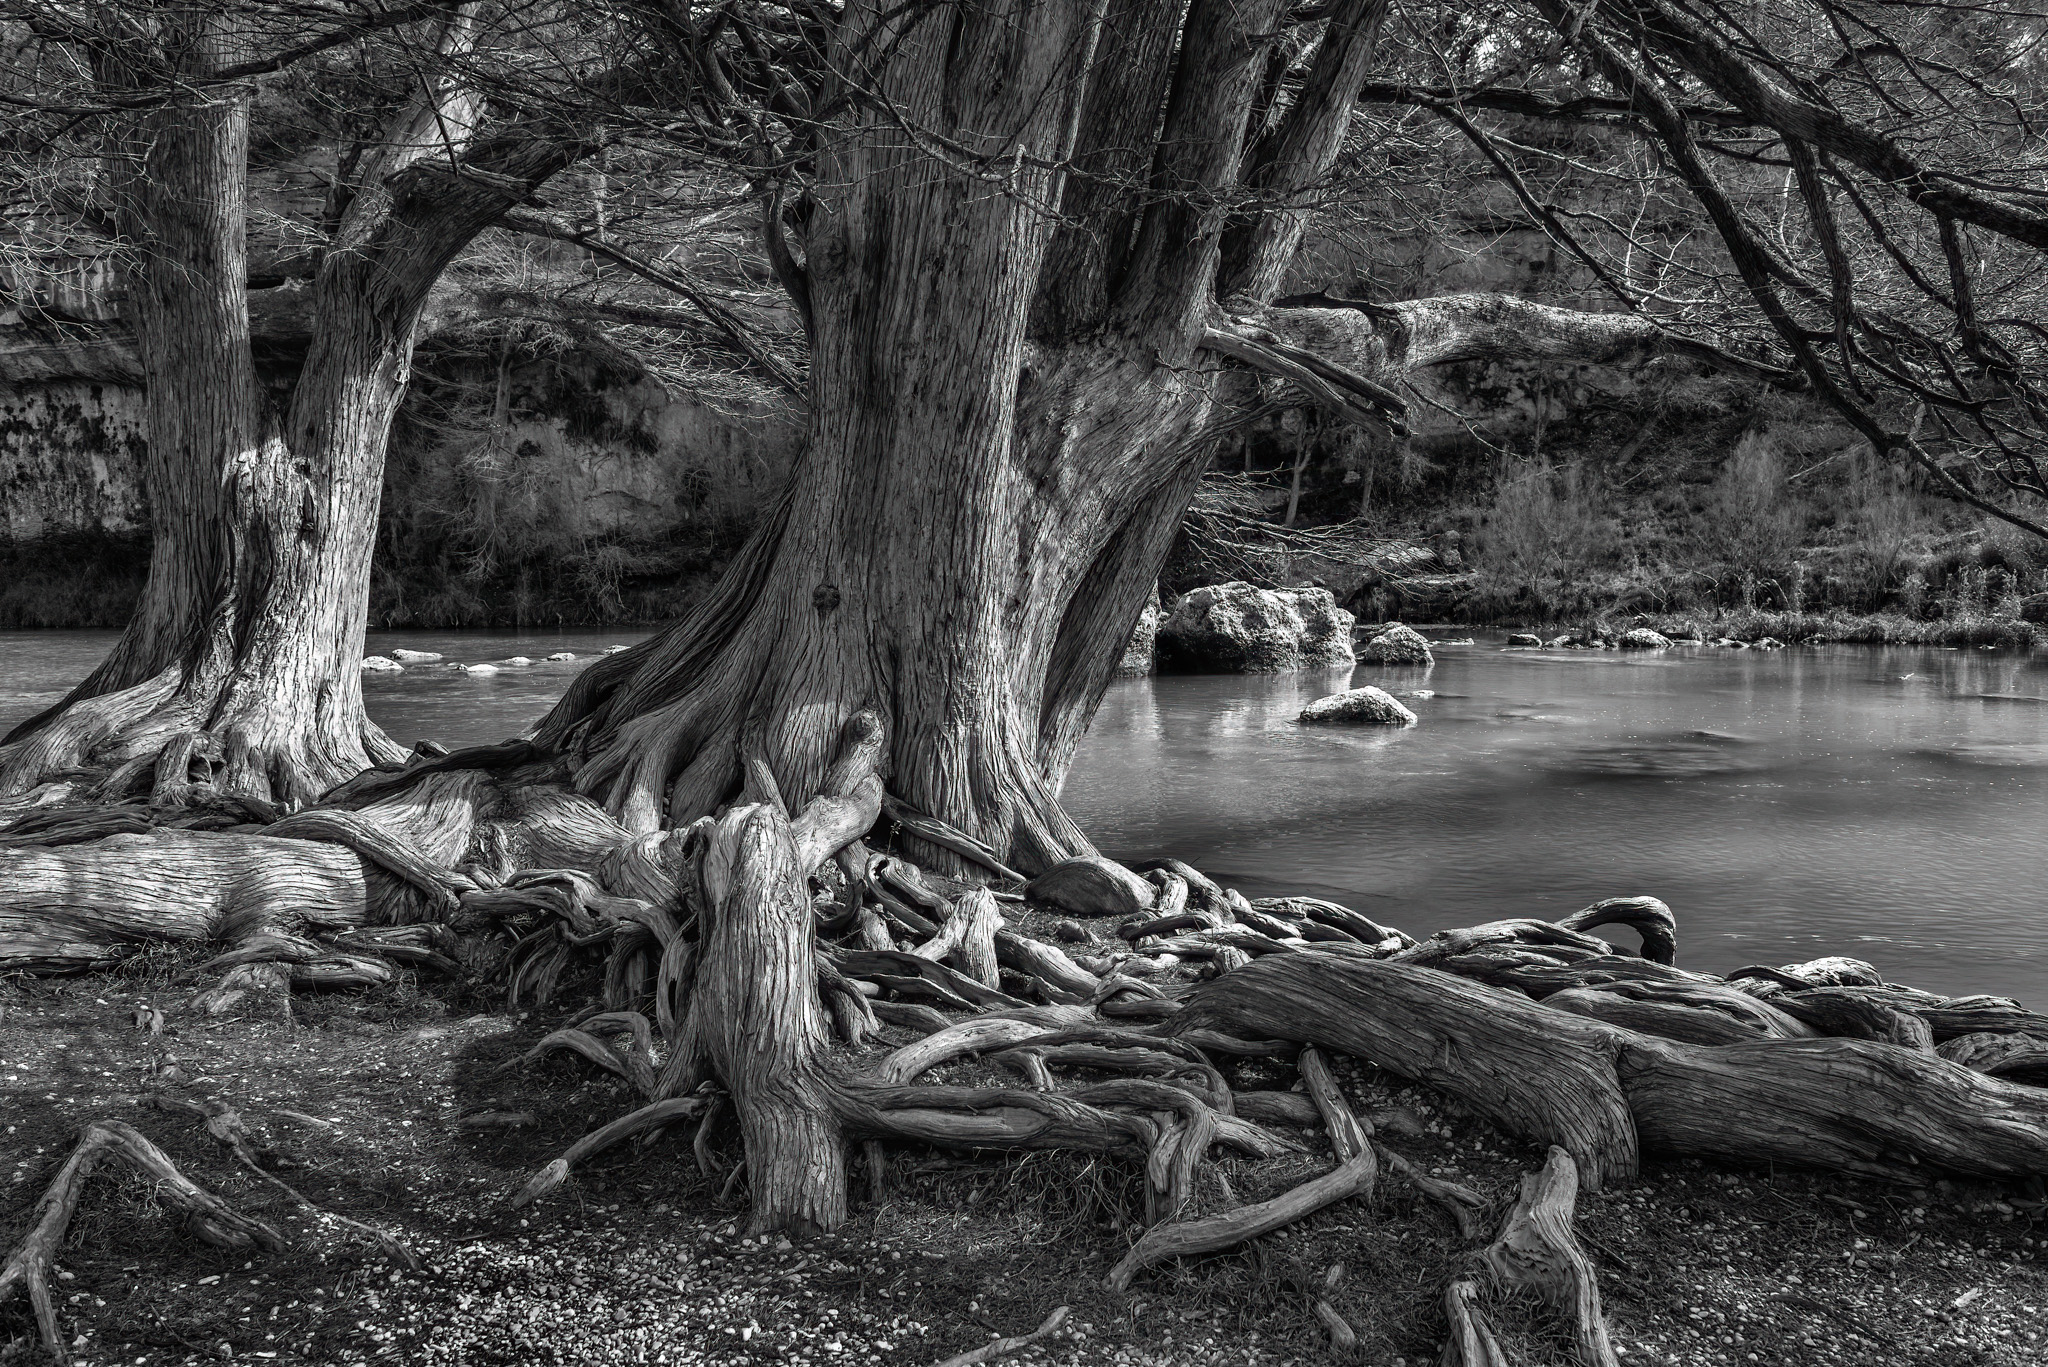
I’ve been going through my Lightroom folders and selecting out images that I think will render well as black and white images. Today I picked this image of the Guadalupe State River Park. I use to live just about 1o minutes from the park before we sold our house so went there often. This particular image was captured in the spring 2015. I think it looks great as a black and white because of the high contrast. Here is the original color image and the steps I took to convert it to this black and white.
First, I use the Nik software – Silver Efex Pro 3 which is my go to software for monochrome conversions. This particular image started with their “More Silver” template which is one of my favorite ones for landscapes. I then added the blue filter and reduce the strength just a bit. This filter darkens up the blue and greens a bit and adds some contrast. I don’t often use the photo filters but a generally test them on all my images. Sometimes, they just work and give me the pop or mood I’m looking for. Like all software you have to experiment with EVERY image uniquely. There is no magic recipe.
Then I added a few control points to bring down the brightness in the foreground and lighten up the areas where the blacks were really blocking up and that was about it. It was back to Photoshop
NEXT, it was time for the luminosity masks. My tool of choice is Tony Kuyper panel. I have been using his tool since his first version I think… can’t even remember the year but I think I was with Photoshop CS3… maybe CS5… but a long time ago! I’m currently using his v6 even though he just launch version 8. The version 6 works fine for me but I’ll upgrade at some point I’m sure… each upgrade is faster and slicker so it is good to stay current.
I wanted to dodge the water some but didn’t want to brighten any of the really bright highlights any more, so I built a mask of lights1 and subtracted 3 through 6 from it. I then just dodged the lights in the water
I also wanted to darken the darks in the water to boost that contrast so I built a mask for burning which was a darks 3 minus levels 5 and 6 so I didn’t further burn the darkest darks. Again I only burned down the shadow darks in the water.
Then, I ran the final composite through Topaz Denoise to add just a touch of denoise and sharpen and that was it. I did crop off the very bright pixels on the top which were a bit distracting and here is the final.
Galleries: The Pixel Mixer. Fine Art America.
My Stock Profiles: Shutterstock. Adobe Stock. Dreamstime
#photography #photo #photographer #fineart #art #gallery #fineartphotography #creative #fineartphoto #fineartphotoprints #fineartprints #prints
