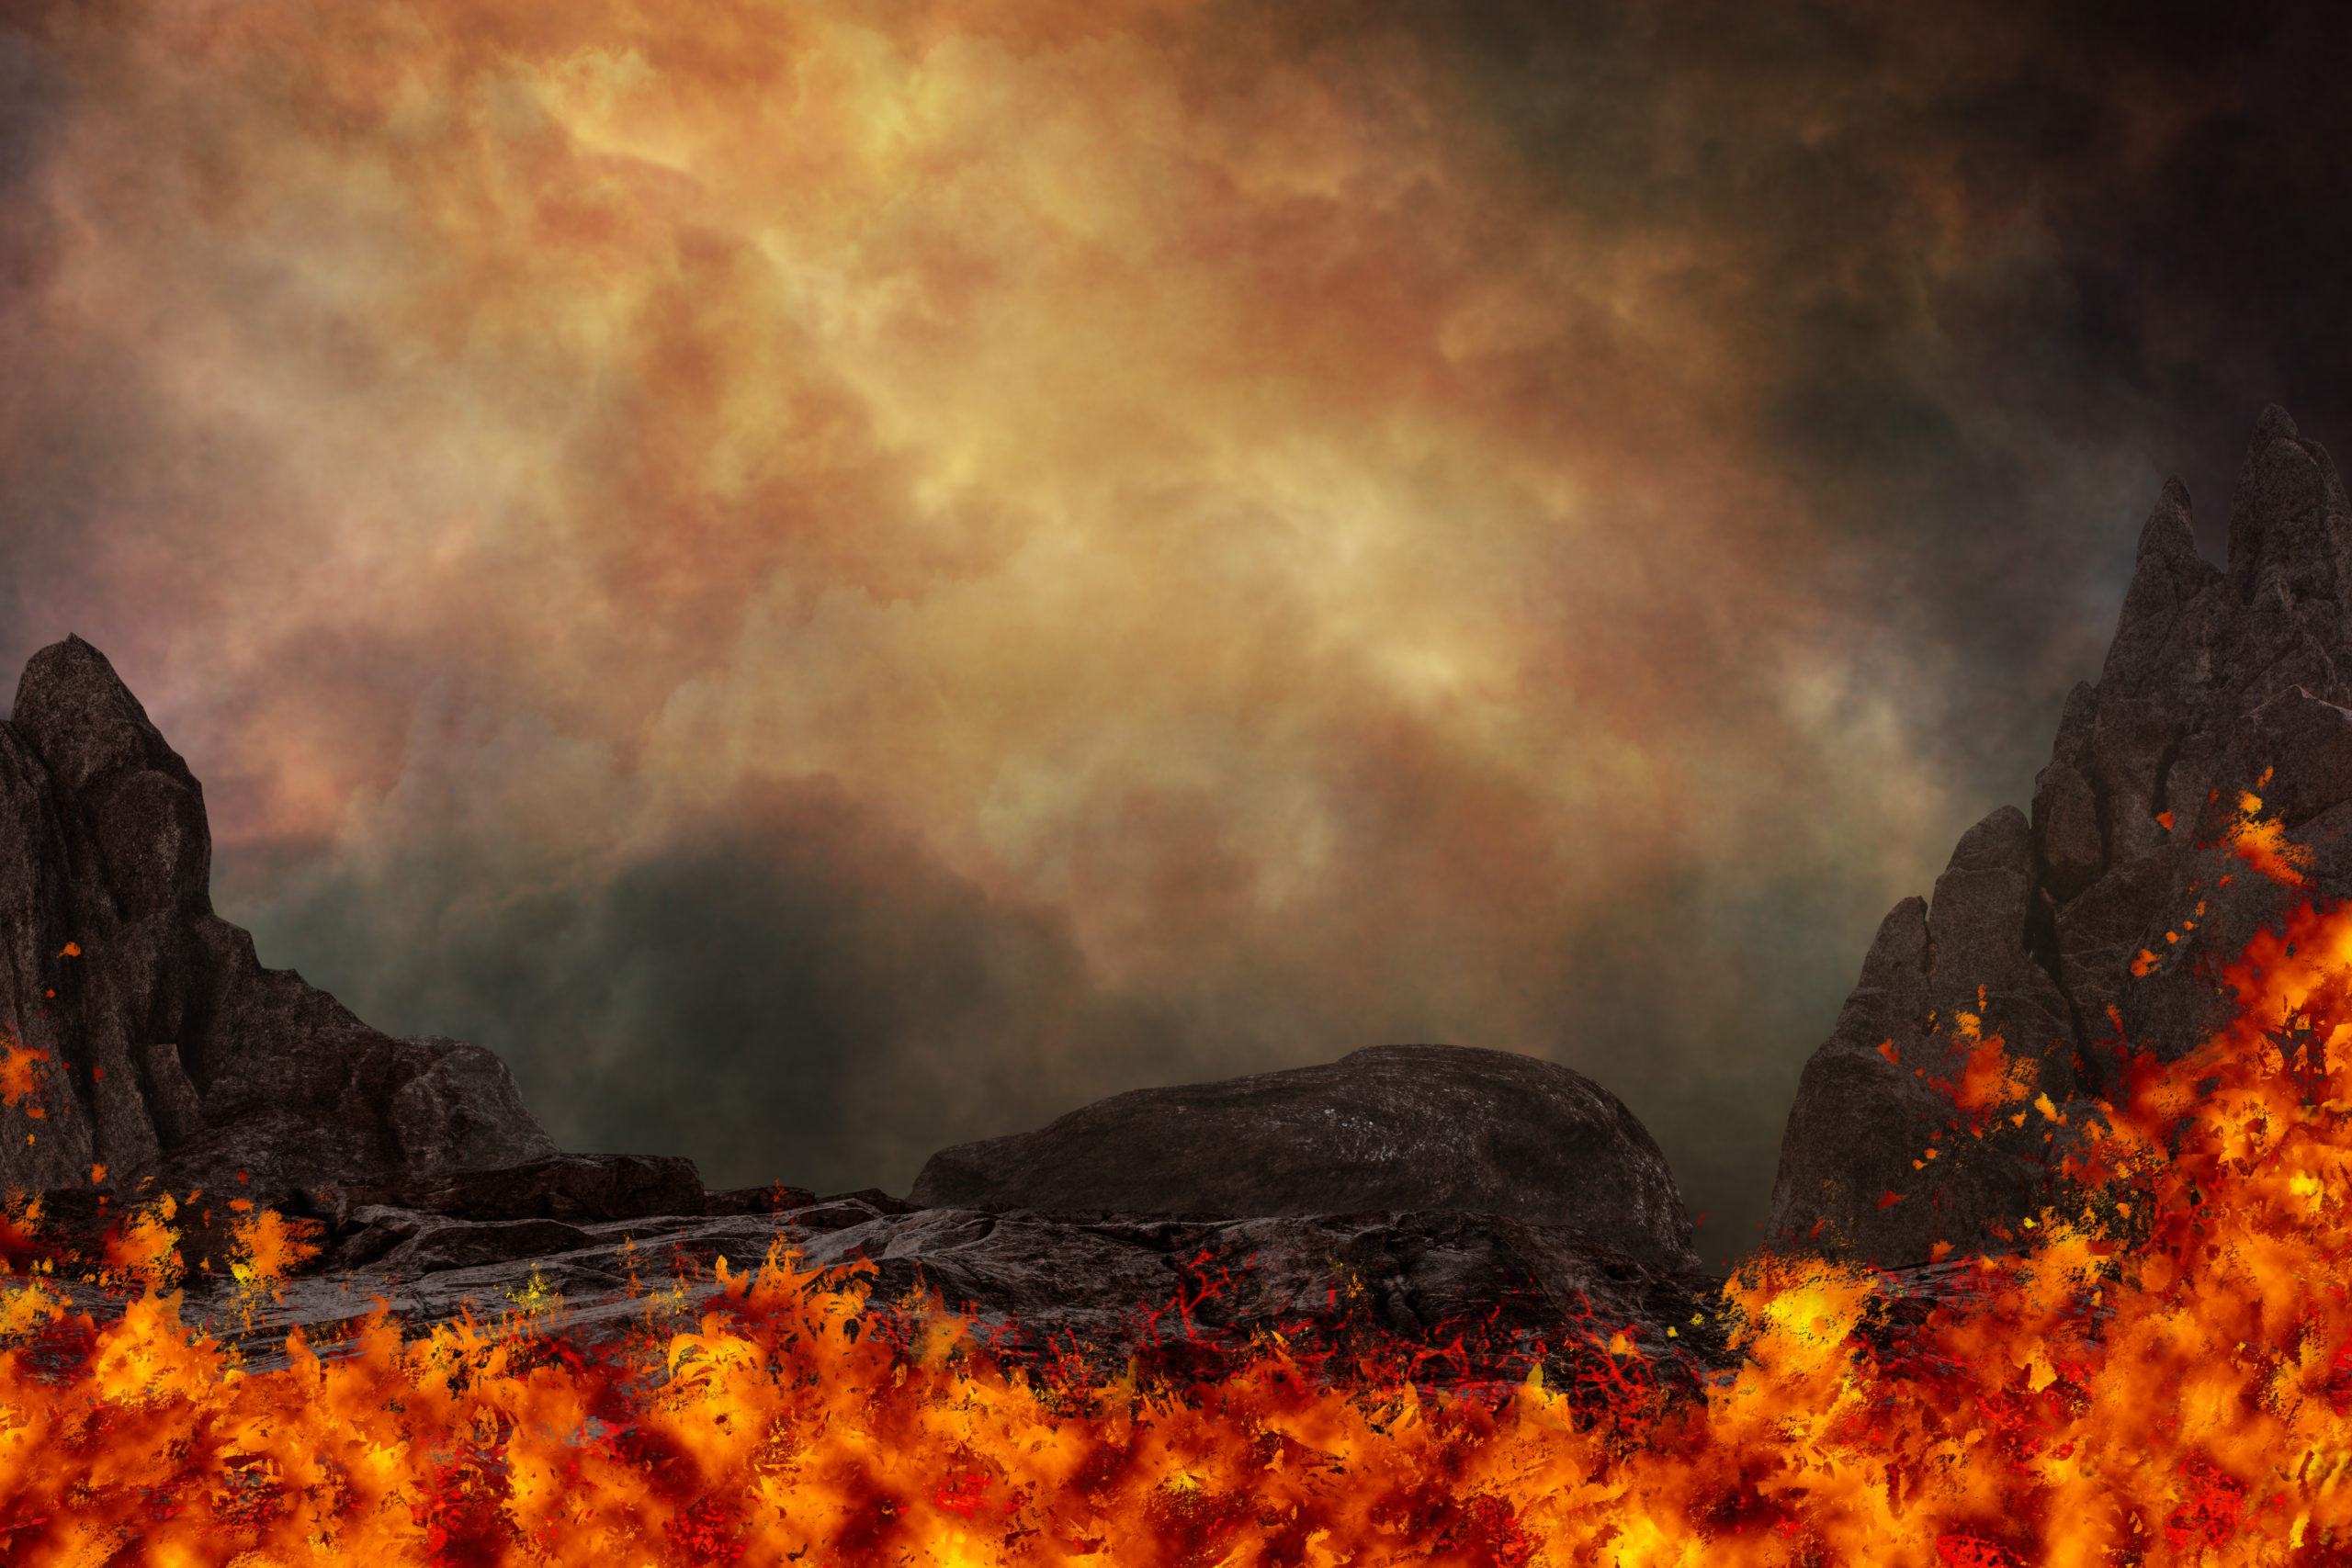
I’m working on a composite and I really want to add some molten lava to the scene. I’ve reviewed several videos on YouTube but the results are just not realistic… So, I decided to experiment and build it myself. The nice thing about photoshop is that there are no limits. If you know the tools and you are willing to explore using those tools in non-traditional ways, you sometimes come up with some creative results. Here are my results of a molten lava flow in front of my scene. (definitely not finished yet.. just a layout.. but displayed here so you can see the new lava effect). And now I will show you how I built it!!
This effect will ultimately use the pattern stamp tool with several different texture brush tips to paint in the lava and fire. But first we need to built the pattern of colored lava. For this, we are going to use a very old and familiar filter of “Render Clouds”
Make a blank layer, then go to Filter -> Render -> Clouds and you will get a pattern of black and white clouds. But we want this to be colored like fire, so I put a gradient map with my fire gradient over it and then it looks like this. Here is my fire gradient.
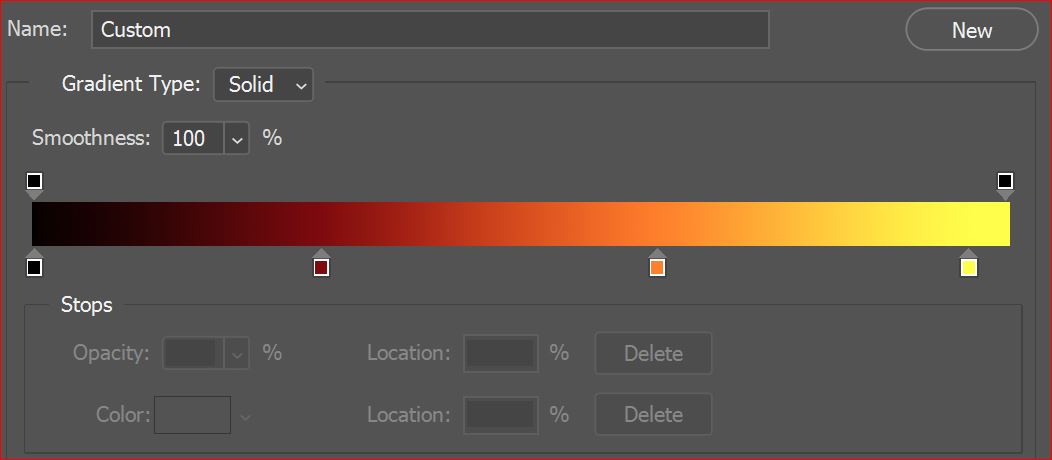
You can download this gradient, just CLICK HERE. It will download to your normal download folder. Double click on it and it will auto load to your PS gradient area. It is called “fire.grd”
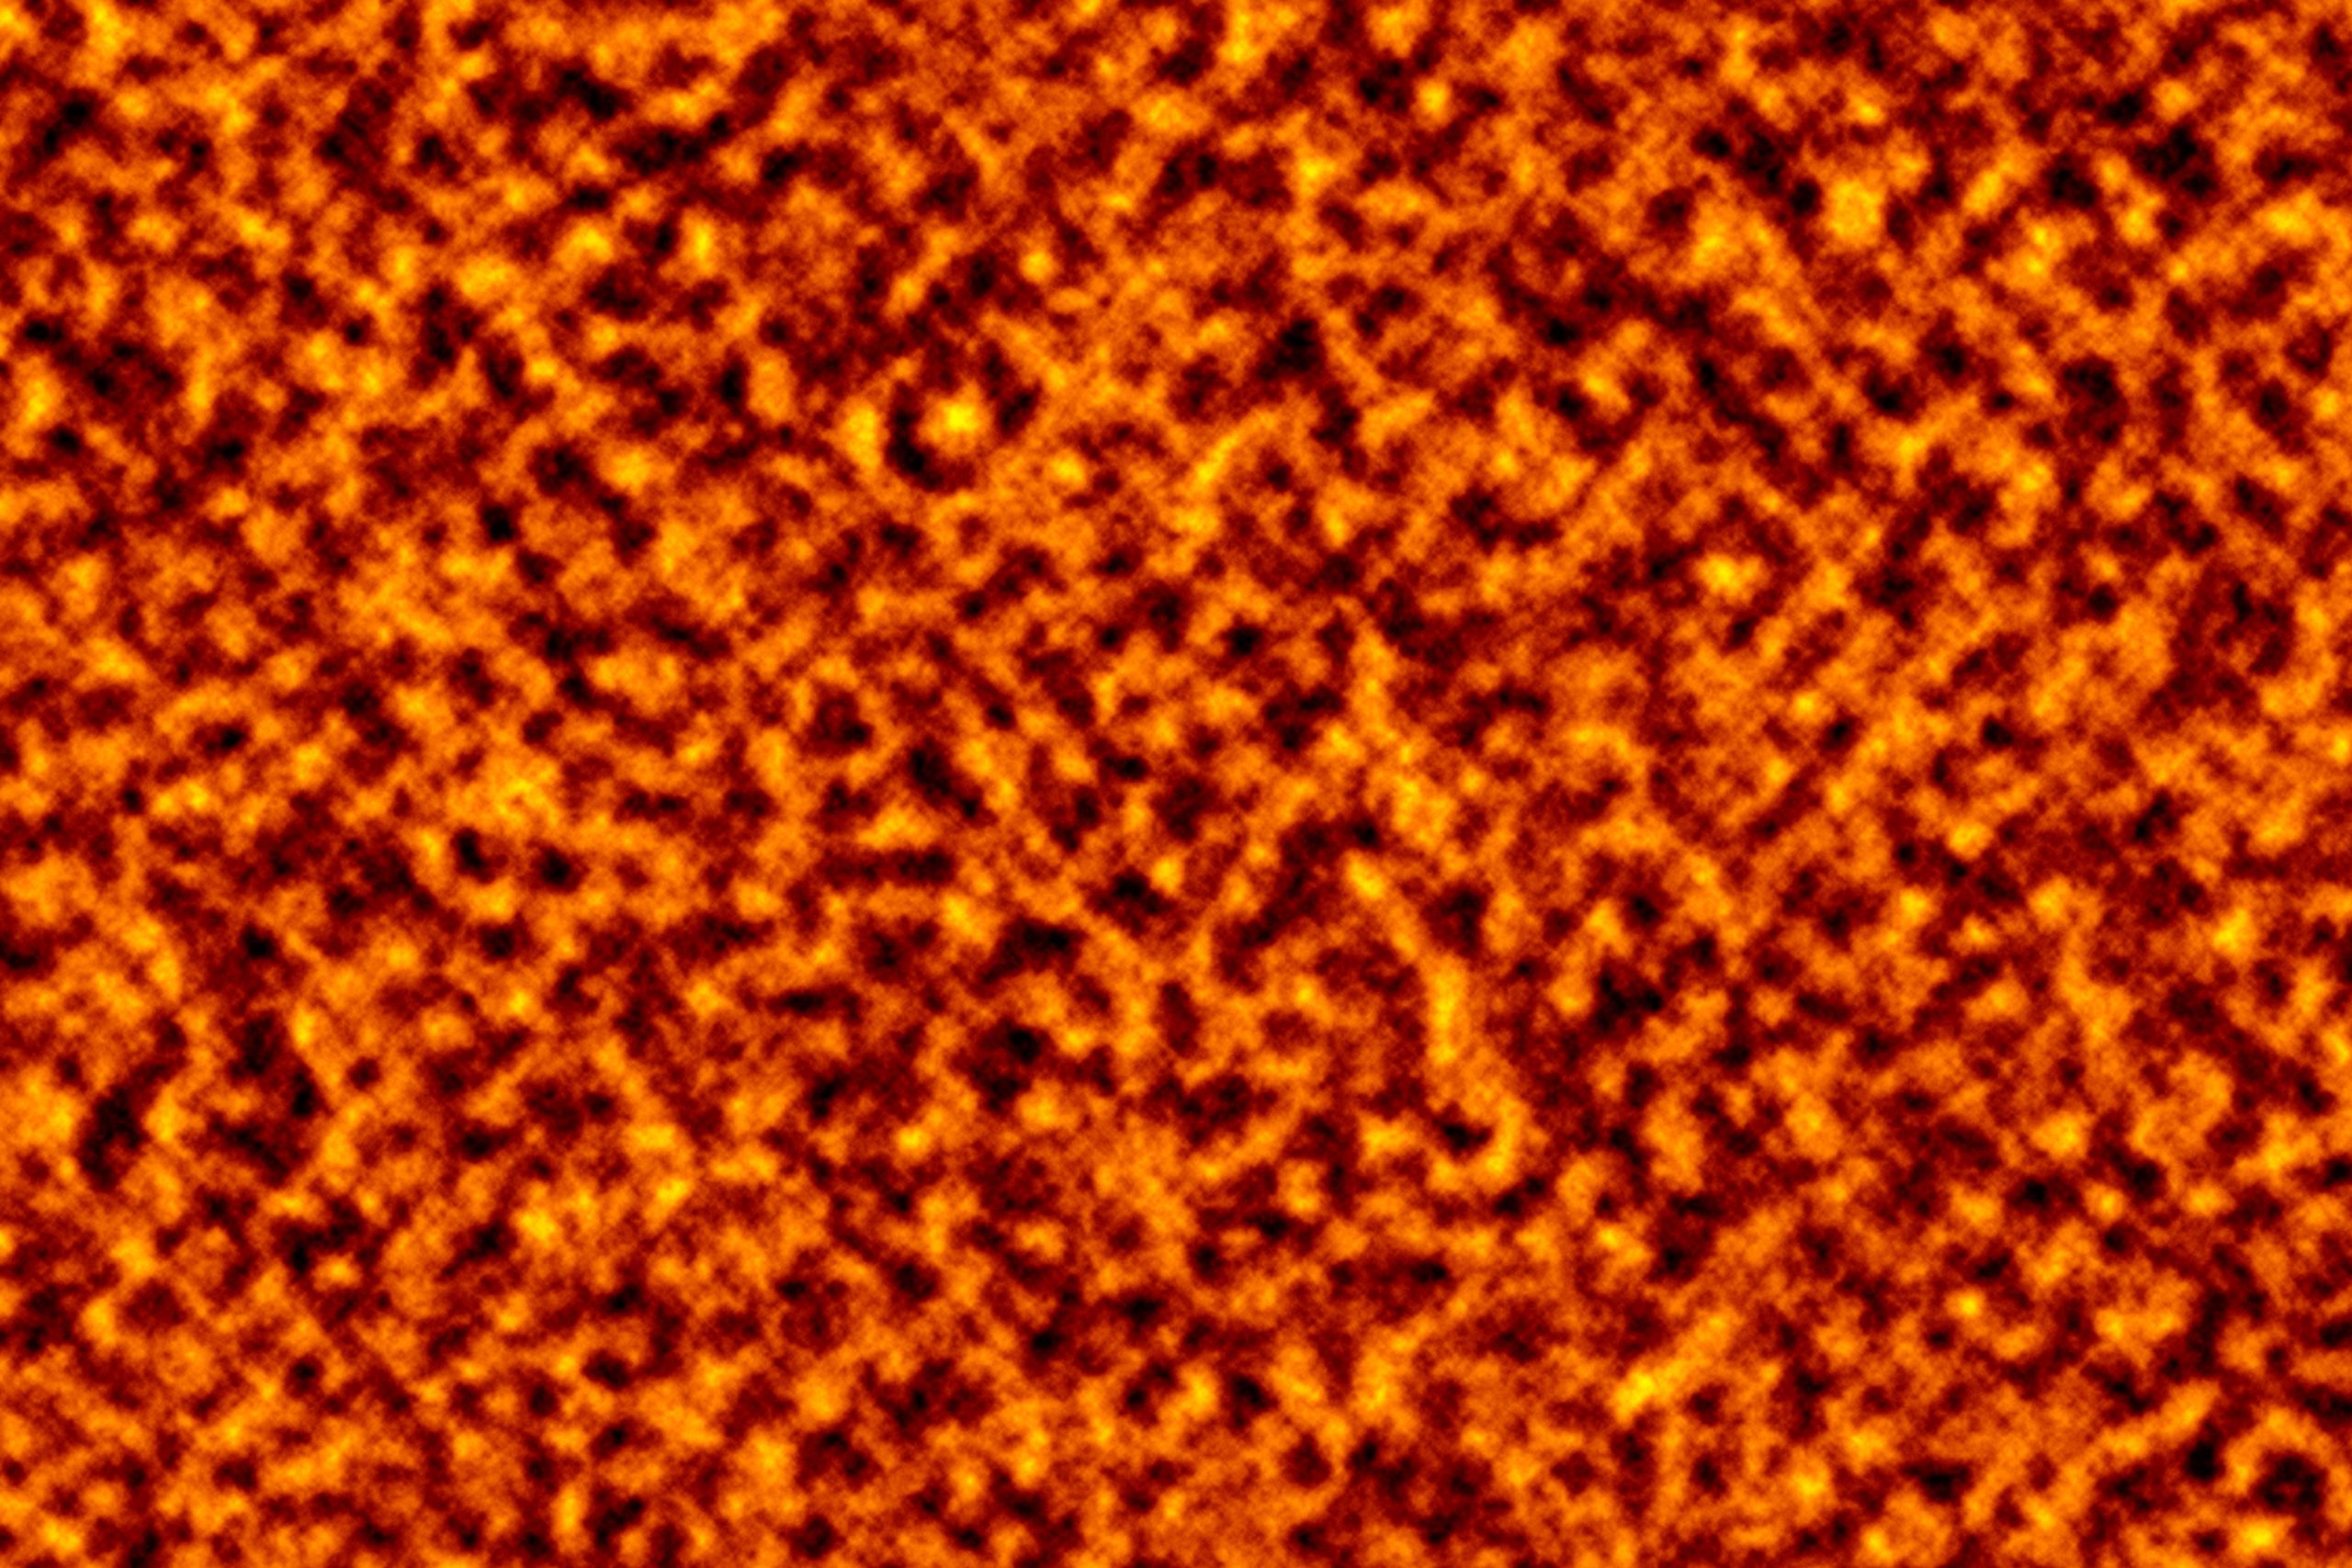
I actually made two layers, one scaled larger (using transform) so I could use the smaller one in background areas and the larger softer one in foregrounds. You just have to switch the loaded pattern up on your tool bar before you paint. Here are the patterns and my layers panel.

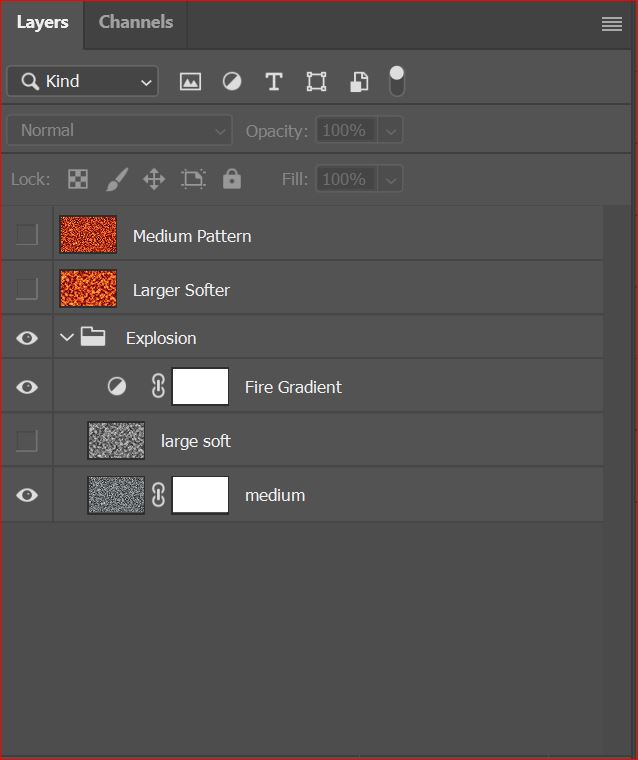
Once you have your layers built, you need to define them as patterns. You do this by just turning on the active layer and going to the menu under Edit -> Define Pattern. Make your small one active/visible and define it as a pattern. Turn the visibility off and then make your larger one active and repeat the “define pattern” step. You now have two new patterns on your pattern tab. I put mine into a folder.

Now that you have your patterns, you are ready to actually use them to create the lava effect on your image. Everything up to this point was getting something for the pattern stamp tool to use. So it’s back to your image and select the pattern stamp tool. It looks like the clone tool with the little checkerboard in the corner. Then up on your menu bar, you need to load one of your two new patterns to the active pattern area.

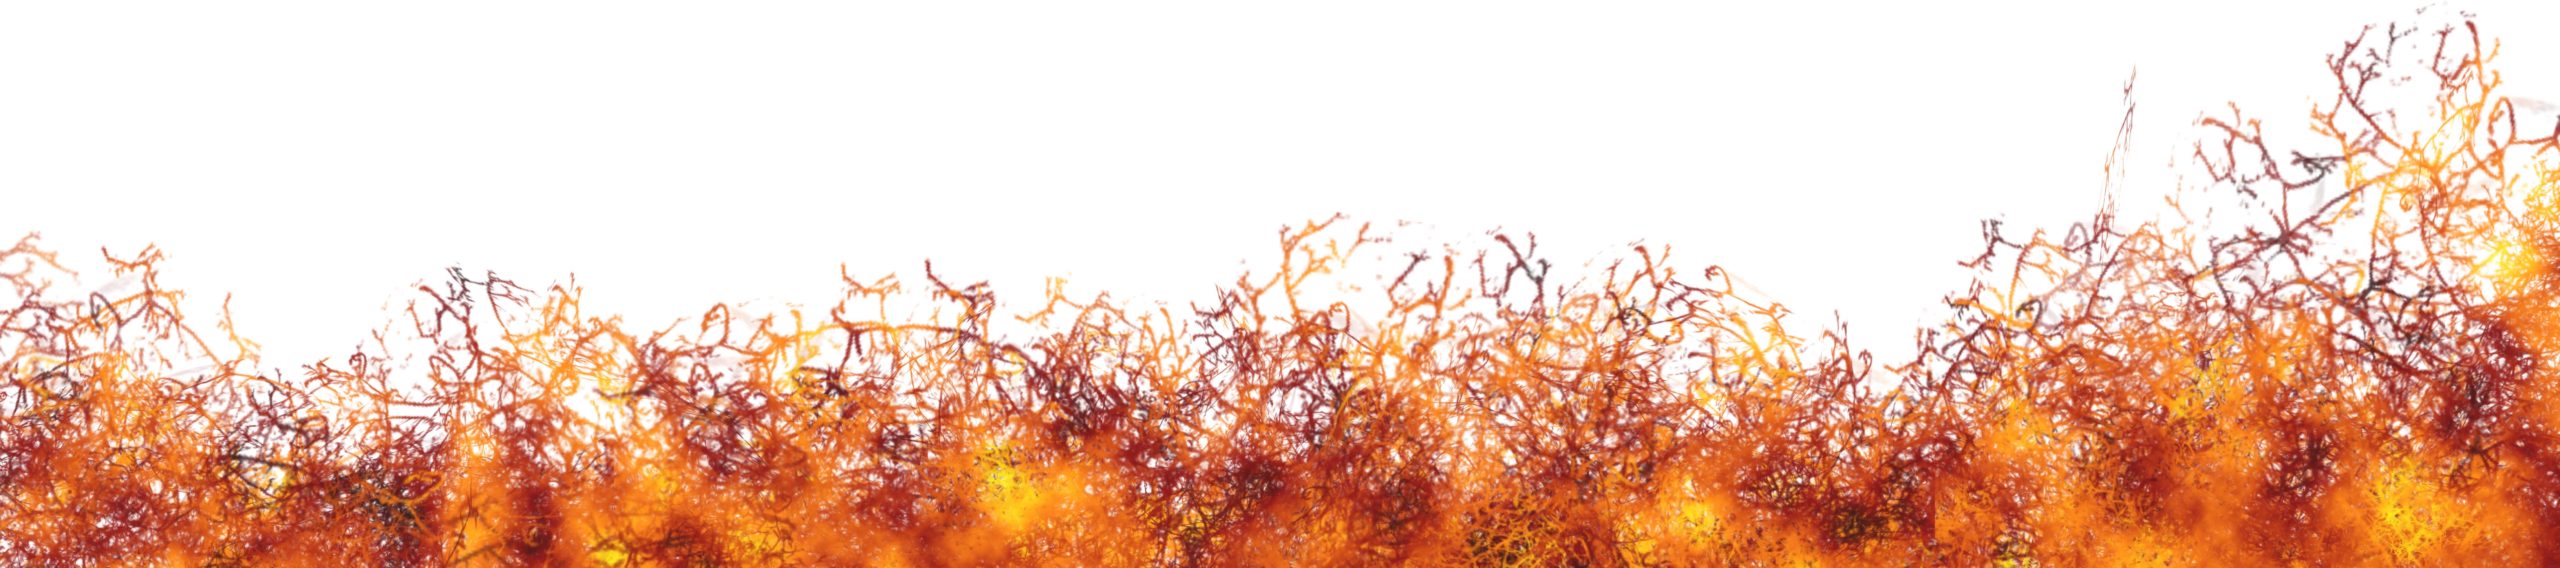
The pattern stamp tool can use ANY PAINT BRUSH TIP. I used the following three tips in the image you are viewing. I experimented with several brushes on different layers until I found something I liked. Lava is rock, so you need something with texture. HINT: If your brush has the little paint brush assigned to it, it will default to the regular paint brush, Click the pattern stamp tool FIRST, then hold down the CTRL+ALT key and click on the brush you want. The brush TIP and settings will be assigned to the pattern stamp tool. (These keys are for windows users, not sure of the keys for MAC, but CMD+OPT may work but I can’t test it as I only have windows)

Here are my two layers. The one layer is in vivid light at 90% opacity. The other is in lighter color at 100%. Again, you must test the blend modes. Every image is different. Blend modes make the paint seamless and interact better with the underlying layers. Sometimes the effect is very subtle but just enough to add realism.
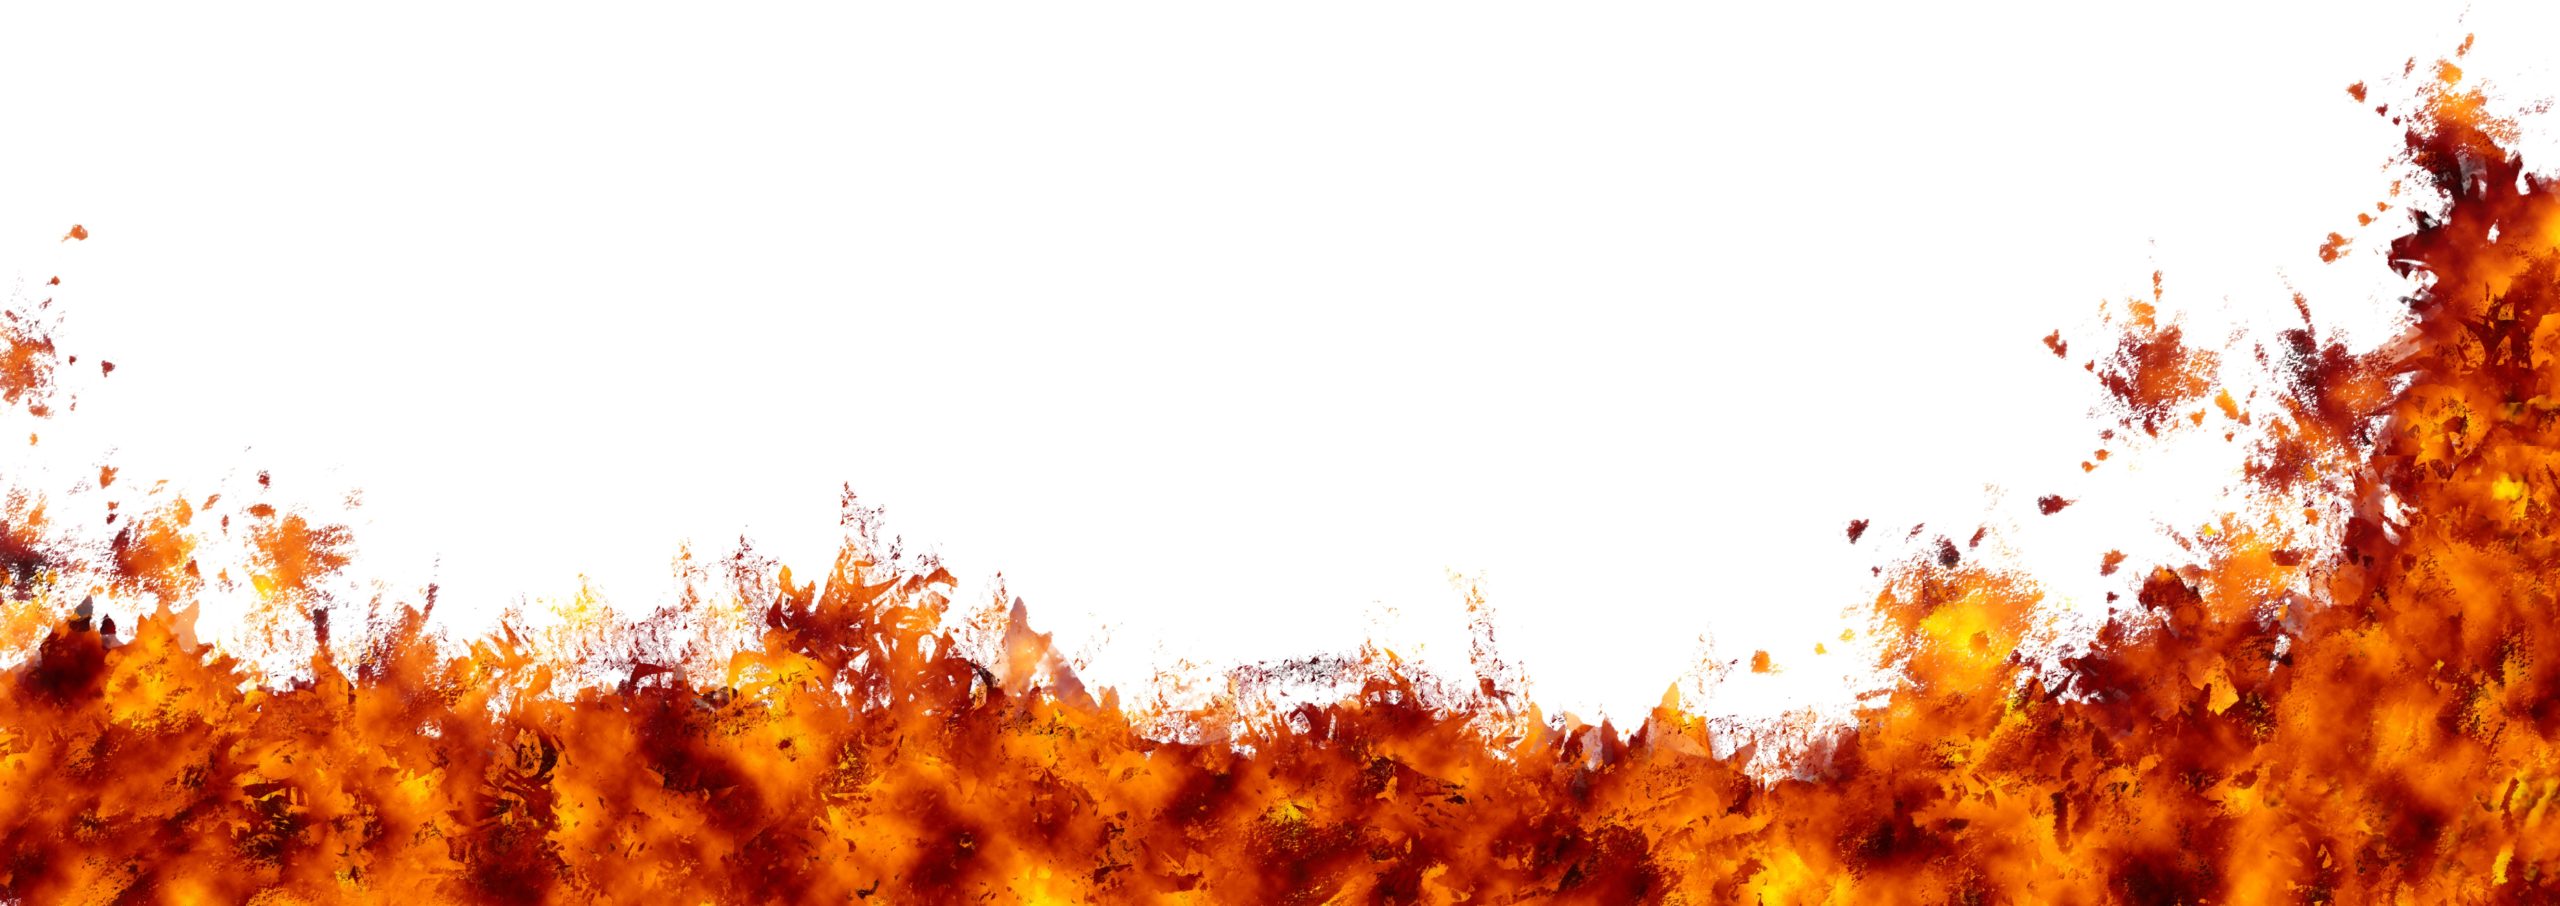
There you have it! Molten Rock and Fire… you can use this same pattern for fire or explosions, just change the brush tips!
Hope you liked the tutorial. Don’t forget to subscribe so you get notifications of future posts.
Now let’s go paint!
Galleries: The Pixel Mixer. Fine Art America.
My Stock Profiles: Shutterstock. Adobe Stock. Dreamstime
#digitalart #art #artist #artwork #fanart #digitaldrawing #digitalillustration #digitalpainting #digitalartist #painting #photoshop #digitalartwork #compositing
#photomanipulation #creative #photoediting #photoshopart #digitalmanipulation #prints
